

How does teeth whitening work? A clear guide for patients
Between bleaching, whitening toothpaste, in-chair treatments, and at-home kits, it’s hard to know what actually delivers real results. The basics are straightforward: teeth whitening uses active ingredients to break down stain compounds so your teeth look lighter. But not all discolouration behaves the same way, and your results will depend on what’s behind the colour change. Some stains sit on the surface and lift easily, while others are locked deep within the tooth structure and need a stronger chemical approach. People who’ve whitened their teeth consistently report noticeable improvements, particularly for everyday stains from coffee, tea, wine, and tobacco. Understanding the difference between stain types is the first step toward choosing a method that works for your situation.
The science behind teeth whitening
Whitening is a cosmetic treatment that lightens the appearance of natural teeth, and it works through two broad mechanisms. Some products scrub away surface stains using mild abrasives or polishing agents, physically removing the discoloured layer. Others work chemically, using peroxide-based ingredients to penetrate the enamel and break apart colour compounds within the tooth itself. Most professional systems rely on hydrogen peroxide or carbamide peroxide to do the heavy lifting, and the concentration of these agents determines how deep the whitening effect reaches. One thing whitening won’t do is change the colour of dental materials like porcelain or composite resin, which is a big reason why professional guidance matters before starting any whitening treatment.
Staining and discolouration over time
Surface stains on the outside of teeth
Coffee, tea, red wine, coloured foods, and tobacco are the usual suspects behind surface staining. These stains sit on or within the outer enamel layer, building up gradually over months and years of exposure. They tend to respond well to whitening because the discolouration hasn’t penetrated deep into the tooth structure, and real-world results from people who’ve treated these stains are consistently positive. Regular cleaning your teeth properly helps slow the build-up of external stains, but once they’ve set into the enamel’s microscopic pores, brushing alone won’t remove them. That’s where whitening products step in, either scrubbing the stain away mechanically or dissolving it chemically through peroxide-based gels.
Deeper changes inside the tooth
Some teeth darken from ageing, enamel wear, certain medications like tetracycline antibiotics taken during childhood, or past trauma that caused internal bleeding within the tooth. Yellow, brown, and grey tones each behave differently during whitening treatment, with yellow tones generally responding best and grey tones being the most resistant to change. Deep internal staining is trickier because the discolouration sits within the dentine layer beneath the enamel, where over-the-counter products simply can’t reach with enough strength to make a difference. Your dentist can assess whether whitening will work for your specific discolouration or whether an alternative like veneers would give a better result.
Does teeth whitening work for everyone?
For a lot of people, yes, it works well. Outcomes hinge on the stain type, the strength of the whitening system, how consistently you use it, and whether you have restorations like crowns or veneers in visible areas. Most people with surface staining from food and drink see a noticeable change of one to two shades lighter with at-home products, and significantly more with professional treatment. Whitening won’t touch the colour of fillings, crowns, veneers, or bridges, so if you have restorations on your front teeth, you could end up with noticeable colour mismatches after treatment. Getting a dental check before whitening is worth the effort because it picks up decay, cracks, gum concerns, or existing sensitivity that could make treatment less effective. A pre-whitening assessment also lets your dentist set realistic expectations for your individual shade improvement.
The teeth whitening process step by step
The role of whitening gel
Whitening gels contain hydrogen peroxide or carbamide peroxide as their active ingredient. When applied to teeth, these compounds break down and release oxygen molecules that penetrate the enamel surface. Those oxygen molecules react with the stain compounds trapped within the enamel’s structure, breaking them apart into smaller, less visible fragments. As those compounds come apart, teeth look brighter and lighter. The concentration of peroxide in the gel determines how aggressively this reaction occurs, which is why professional-grade products at higher concentrations produce more dramatic results than what you’d find on a supermarket shelf.
What happens during in-chair treatment
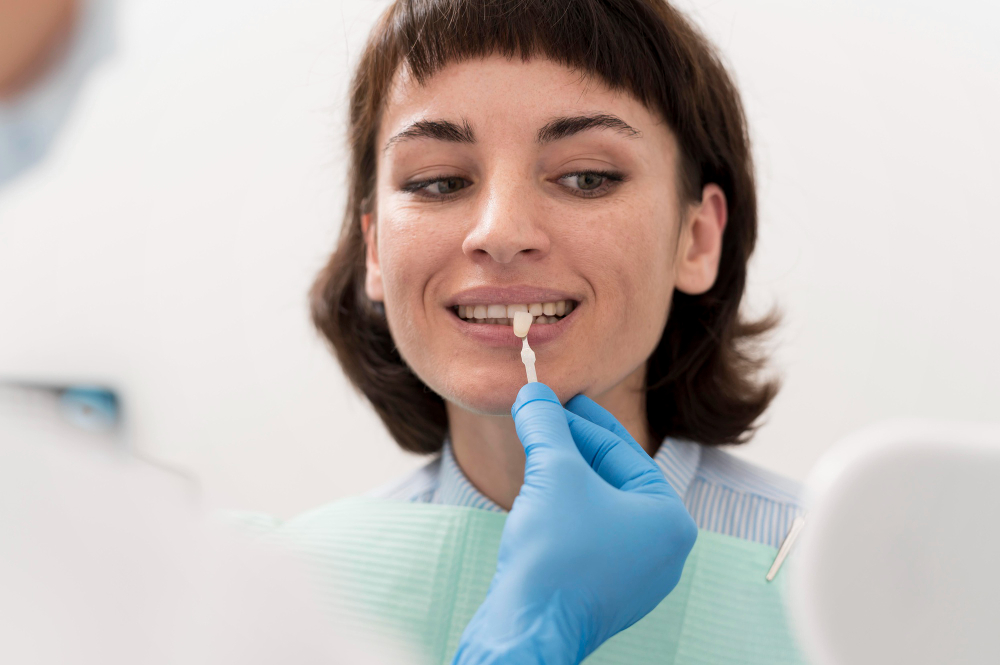
Your dentist starts by checking for decay, cracks, or gum issues that could cause problems during whitening. Once everything is cleared, a protective barrier is placed over your gums and lips to shield the soft tissue from the peroxide gel. The whitening gel is then applied directly to the tooth surfaces in one or more rounds, with each application lasting around 15 to 20 minutes. Between rounds, your dentist checks your shade progress and comfort level, adjusting the gel concentration or exposure time if needed. The entire process wraps up in a single appointment, and you walk out with visibly lighter teeth.
How take-home trays work
With dentist-supplied take-home kits, impressions of your teeth are taken to create custom-fitted trays that hold the gel snugly against every surface. You fill the trays with a lower-concentration peroxide gel and wear them for 30 to 60 minutes per day over a course of two to four weeks. The gradual approach allows the peroxide to work progressively without overwhelming your enamel or gums. Because the trays are moulded to your teeth, the gel stays where it needs to be rather than leaking onto soft tissue or missing curved areas. Your dentist monitors your progress and adjusts the treatment plan if sensitivity develops or if certain teeth need more attention.
In-chair teeth whitening vs take-home whitening
The two main professional whitening approaches suit different preferences and lifestyles. The table below compares key differences between in-chair treatment and dentist-supplied take-home trays.
Factor | In-chair whitening | Take-home trays (dentist-supplied) |
Treatment time | Typically 60–90 minutes per session | 30–60 minutes daily over 2–4 weeks |
Peroxide concentration | Higher (up to 35–40% hydrogen peroxide) | Lower (10–20% carbamide peroxide) |
Speed of results | Visible change after one session | Gradual improvement over days to weeks |
Supervision | Dentist present throughout | Self-administered with dentist instructions |
Tray fit | Not applicable (gel applied directly) | Custom-fitted from impressions of your teeth |
Sensitivity risk | Short-term sensitivity possible post-treatment | Lower per session due to gentler concentration |
In-chair whitening happens at the dental clinic under direct supervision. Your dentist assesses tooth and gum health, protects your gums and lips with a barrier, applies the whitening gel, and monitors you throughout the entire process. The payoff is faster visible results, controlled application, and treatment adjusted in real time to your comfort level. Custom take-home trays made from impressions of your teeth give better gel contact than anything off the shelf, and you whiten gradually over days or weeks, which suits people who prefer working at their own pace.
Teeth bleaching vs whitening toothpaste
People swap “bleaching” and “whitening” around like they mean the same thing, but they don’t. Whitening toothpaste removes some surface staining through mild abrasives or polishing agents, and while it can help maintain results after a professional treatment, it won’t create the same colour shift as peroxide-based bleaching on its own. Bleaching reaches stain molecules deeper within the tooth than toothpaste ever could, because the peroxide physically penetrates the enamel rather than just scrubbing the outer surface. For the right cases, the difference between the two is noticeable within just a few days. That said, how well bleaching works still comes down to the stain type and the condition of your enamel, which is another reason a dental assessment before treatment is so valuable.
What about UV teeth bleaching?
Some whitening systems use a light during treatment, sometimes called UV teeth bleaching, blue-light whitening, or light-activated whitening. The gel does the actual work of breaking down stain compounds. The light is claimed to accelerate the chemical reaction in the gel, but research published in the Journal of the American Dental Association found that light-activated systems did not produce significantly better whitening outcomes compared to the gel alone. What counts most is proper diagnosis, safe application of an appropriate-strength whitening agent, and having a registered dental professional overseeing things. They’ll determine the right approach for your teeth rather than leaving you guessing about whether a light add-on is worth the extra cost.
Keeping your results looking great
Whitening isn’t permanent, and how long results stick around depends heavily on your daily habits. Frequent coffee, red wine, or tobacco exposure will accelerate re-staining, sometimes within just a few months. Good oral hygiene, including regular professional cleaning, helps extend the life of your results. Maintenance treatments using take-home trays for a few nights every six to twelve months are common for people who want to keep their shade consistent over time. Whitening works best as an ongoing part of your dental care routine rather than a one-off fix. Keep your expectations grounded: the goal is brighter, fresher-looking teeth at a natural shade that looks great in person.
When professional advice matters most
If you notice uneven colour, one tooth that’s darker than the rest, restorations on your front teeth, or a history of sensitivity, start with a dentist review before buying any whitening product. Some discolouration flags an underlying dental issue, like internal decay or a dying nerve, rather than a simple cosmetic concern that whitening can fix. A plan built around your individual teeth and circumstances gives the most natural-looking, comfortable result because it accounts for factors that a generic product never could. Choosing a known peroxide-based product with dentist oversight makes a real difference compared to guessing with unregulated options bought online. If you’re thinking about teeth whitening, a conversation with your dental team is the best first step toward results you’ll actually be happy with.
Frequently asked questions
An in-chair whitening session typically runs 60 to 90 minutes. Take-home trays are worn for 30 to 60 minutes per day, and a full course usually spans 2 to 4 weeks depending on the concentration of the gel and your starting shade.
It depends on the cause and severity of your sensitivity. Mild sensitivity can often be managed with a lower-concentration gel and desensitising toothpaste used for a week or two before treatment. If your sensitivity is caused by cracked enamel, exposed roots, or active decay, whitening should be postponed until those issues are treated. Your dentist will assess this during a pre-whitening check.
Whitening gel only affects natural tooth structure. Crowns, veneers, bridges, and fillings will stay the same colour, which can create a visible mismatch if they’re on front teeth. If you’re planning restorations and whitening, most dentists recommend whitening first and then colour-matching the restoration to your new shade.
Professional in-chair whitening typically achieves 4 to 8 shades of improvement in a single session, measured on a standardised dental shade guide. Take-home trays produce similar end results over a longer timeframe. The exact outcome depends on your starting shade, the type of staining, and enamel condition.
When used as directed and at appropriate concentrations, professional whitening does not cause permanent enamel damage. Overuse or misuse of high-concentration products without dental supervision can lead to enamel erosion and increased porosity, which is why following your dentist’s instructions matters.
Source: Effectiveness of light-activated whitening systems — Kossatz et al., Journal of the American Dental Association, 2011.
Booking a dental appointment shouldn’t feel like a guessing game. Plenty of our Gisborne patients ask whether they should see an oral health therapist or a dentist, especially when their family includes kids, teens and adults with different needs.
The short answer? Both are university-trained, registered dental professionals who play important roles in keeping your smile healthy. The real difference between an oral health therapist and a dentist comes down to training pathways, scope of care, and the kind of treatment you need on the day.
This guide breaks down OHT vs dentist in plain language so you can book the right appointment with confidence, whether it’s a routine clean, a chipped tooth, or something that’s been niggling for weeks
What is an oral health therapist?
An oral health therapist (OHT) is a registered dental practitioner who has completed a university qualification combining dental hygiene and dental therapy. The Bachelor of Oral Health is typically a three-year degree, and graduates are registered with the Dental Board of Australia in the same national framework as dentists.
Their focus sits firmly in preventive care, patient education and selected restorative work. An OHT typically helps with check-ups and professional cleans, gum health support, fluoride applications, fissure sealants, oral hygiene coaching, children’s dental care, and certain fillings within their scope of practice.
Scope varies based on individual training, qualifications and experience, so two OHTs may offer slightly different services. Some have additional training in areas like teeth whitening or sports mouthguards, while others focus heavily on paediatric work. Worth saying clearly: an OHT is not a “lesser” version of a dentist. They’re a vital part of a modern dental team, and many patients enjoy how unhurried and education-focused these visits feel. Australian patient discussions online often describe OHT appointments as feeling more like a thorough conversation about your mouth than a quick scrape-and-go.
What does a dentist do?
A dentist is a primary dental care provider trained across the full breadth of diagnosis and treatment. After roughly five years of university study (a Bachelor of Dental Surgery or Doctor of Dental Surgery, depending on the institution), dentists handle everything from routine examinations through to complex restorative and surgical work.
That includes diagnosing dental disease, treatment planning, fillings, crowns and bridges, root canal treatment, extractions, cosmetic procedures, dental implants, and management of pain and emergencies.
Dentists also read and interpret radiographs across the full spectrum, prescribe medications including antibiotics and pain relief, administer local anaesthetic for surgical procedures, and lead treatment for trauma cases. When a problem moves beyond preventive or straightforward care, a dentist is usually the clinician guiding what happens next, including coordinating any specialist referrals to endodontists, periodontists, oral surgeons or orthodontists.

Side-by-side comparison: OHT vs dentist
Here’s how the two roles compare across the parts of dentistry patients ask about most.
| Area | Oral Health Therapist (OHT) | Dentist |
|---|---|---|
| Training and qualifications | Three-year Bachelor of Oral Health combining dental hygiene and dental therapy. | Five-year Bachelor of Dental Surgery or equivalent, plus three or more years of postgraduate training to specialise in areas like orthodontics, endodontics or oral surgery. |
| Examinations and diagnosis | Runs examinations within scope, takes radiographs, and flags anything needing a dentist’s input. Refers across for definitive diagnosis of complex disease. | Diagnoses the full range of dental and oral conditions, including pulp disease, oral pathology, occlusal problems and developmental concerns. |
| Preventive care and cleans | Core focus day to day. Covers scaling, polishing, fluoride, sealants, dietary advice and personalised brushing and flossing coaching. | Provides preventive care alongside diagnostic or restorative work in the same appointment, rather than as the main focus. |
| Fillings and restorations | Places direct fillings such as composite and glass ionomer on adult and paediatric teeth, within scope. | Handles the same fillings, plus indirect restorations like inlays, onlays, porcelain crowns, bridges and veneers. |
| Gum disease management | Often the long-term clinician for patients managing gingivitis or stable periodontitis. Leads ongoing periodontal maintenance, deep cleans and home-care reviews. | Diagnoses periodontal disease, plans treatment, and manages advanced cases or anything needing surgical intervention or specialist referral. |
| Children’s dentistry | Works extensively with kids, covering baby teeth fillings, sealants, preventive plans and habit education for parents. | Steps in for trauma, complex paediatric extractions, behaviour management for anxious children needing sedation, and orthodontic assessments. |
| Surgical and complex work | Does not perform extractions of permanent teeth, root canals, implant surgery or other surgical procedures. | Handles extractions including wisdom teeth removal, root canal therapy, implant placement and bone grafting where appropriate. |
| Cosmetic and orthodontic care | With the right training, can provide teeth whitening. Planning or placing veneers, crowns or orthodontic appliances sits outside scope. | Plans and delivers cosmetic treatment, Invisalign and traditional braces where qualified. |
| Emergencies | Well-trained to triage pain, swelling, infection, broken teeth or dental trauma, and offer a preliminary diagnosis. May work with a dentist on the best immediate and long-term solution. | Manages definitive treatment for emergencies, often in collaboration with the OHT. |
Neither role is better than the other. They’re built to complement each other, and most patients benefit from seeing both at different stages of their care.
Qualifications and registration in Australia
Both OHTs and dentists must be registered with the Dental Board of Australia through AHPRA. Registration means they meet national standards, hold appropriate insurance, and continue their professional education each year. Both can be reported and audited under the same regulatory framework.
Job titles tell you the broad scope, but individual competence still depends on each clinician’s training and experience. Australian dental forums often note that OHTs build strong long-term rapport with patients because they see them regularly for maintenance, while dentists tend to take the lead on more complex work. That’s why a good practice matches you with the clinician best suited to your specific needs, rather than defaulting to one provider for everything.
When you'd usually see an oral health therapist
Book with an OHT for routine check-ups and cleans, preventive visits, gum health maintenance, oral hygiene coaching, and most children’s appointments. Parents in Australian online forums often mention how much they appreciate OHTs taking extra time to build positive habits with kids, rather than rushing through a cleaning.
Nervous patients also tend to enjoy these appointments. The pace is slower, the focus is preventive, and there’s space to ask questions about brushing technique, diet, or that one spot you keep missing. If something more complex shows up during your visit, your OHT will loop in a dentist within the practice so you don’t have to start over.

When you need to see a dentist
Book with a dentist if you have toothache, swelling, a broken or cracked tooth, suspected infection, dental trauma, or a heavily decayed tooth. Dentists also handle root canals, crowns, bridges, adult extractions, cosmetic treatment planning, and emergencies.
A quick word on social media dental advice: viral TikTok and Instagram trends have pushed plenty of DIY hacks, from charcoal scrubs to filing teeth at home. If you’re tempted by something you’ve seen online, please book a dentist instead. Diagnosis and treatment planning sit firmly in their scope, and a proper assessment is far safer than a trend.
Frequently asked questions
Not quite. A dental hygienist focuses on cleaning and gum health for adults. An OHT is dual-qualified across hygiene and therapy, which means they also treat children and place certain fillings. In practice, an OHT covers a broader scope than a hygienist alone.
Yes. Paediatric fillings sit well within an OHT’s training, and many practices route children’s restorative work to an OHT by default. If the case is complex, involves a permanent tooth in a tricky position, or your child needs sedation, a dentist will usually take over.
Yes, OHTs are trained to administer local anaesthetics for the procedures within their scope, including fillings and deeper cleans. If you’ve been numbed for a paediatric filling or a scale and root planing appointment, an OHT can handle that part. Surgical anaesthesia for extractions or sedation work stays with a dentist.
At our practice, our oral health therapist works closely with the dentist to review cases. Especially when the clinical situation is more complex, this ‘shared care’ model ensures that all perspectives of care is covered to provide the best outcome, and for the patient’s it’s a win because it’s like having 2 clinicians’ care for the price of one!
Noticed chalky patches, white blotches, or small white dots on your teeth? You’re not alone. White marks on teeth are one of the most common cosmetic concerns we see, and they affect both children and adults.
The good news is they’re usually not an emergency. The less straightforward news is that appearance alone can’t tell you the cause. Some white spots are purely cosmetic and have been there since childhood. Others are early signs of mineral loss that, left unchecked, can progress to cavities and bigger problems down the track.
The cause matters because it changes what you should do about it. A white spot from fluorosis needs a completely different approach to one caused by early decay. And some white marks that look concerning are actually stable and don’t need treatment at all.
This guide breaks down why white discolouration appears on teeth, how to tell whether yours needs attention, and what your treatment options look like, from the most conservative through to cosmetic solutions.
What causes white marks on teeth?
White spots, patches, and blotches can show up for several different reasons. Understanding which one applies to you is the first step toward knowing whether treatment is needed or whether monitoring is enough.
Early demineralisation
This is the most important cause to recognise because it’s the one that can get worse. Demineralisation is the first visible stage of enamel breakdown, where acids produced by bacteria dissolve minerals out of the tooth surface. The affected area looks matte, chalky, or opaque compared to the surrounding enamel. At this stage the surface is still intact, which means the process can sometimes be slowed or reversed with the right care. Left alone, it can progress into a full cavity.
Fluorosis
Fluoride is essential for strong teeth, but too much during childhood development can leave permanent white flecks or streaks in the enamel. This is called dental fluorosis. In Australia, most tap water is fluoridated at a controlled level, so fluorosis here tends to be mild. It’s more commonly seen when young children swallow toothpaste regularly or use adult-strength fluoride products too early. The marks are usually symmetrical across matching teeth and don’t change over time.
Enamel hypoplasia
Sometimes the enamel simply doesn’t form properly during childhood. High fevers, nutritional deficiencies, premature birth, or illness during key developmental stages can all disrupt enamel formation. The result is patches of thinner or softer enamel that appear whiter or more opaque than the surrounding tooth. This isn’t caused by anything the patient did wrong. These marks are stable but can make the affected areas more vulnerable to wear and decay over time.
White spots after braces
One of the most common times people notice white marks is after orthodontic brackets come off. When cleaning around braces is difficult, plaque builds up against the enamel and causes localised demineralisation. The white patches typically sit in a pattern matching where the brackets were bonded. For teens and parents, this is worth knowing about before and during orthodontic treatment, not just after.
Acid erosion from diet
Frequent exposure to acidic foods and drinks, think soft drinks, energy drinks, citrus, sports drinks, and even kombucha, can soften and erode enamel over time. As the enamel thins or loses minerals, it changes how light reflects off the surface, creating a chalky or uneven appearance. This is different from a single cavity forming in one spot. Acid erosion tends to affect broader areas, particularly the front surfaces of teeth.
Dry mouth and mouth breathing
This one often gets overlooked. When saliva flow drops, whether from mouth breathing during sleep, certain medications, or chronic nasal congestion, the teeth lose their natural protective coating. Enamel can appear temporarily chalky or develop white patches from dehydration. In children who habitually breathe through their mouth, this can become an ongoing issue that affects enamel development. If your child snores or sleeps with their mouth open, it’s worth mentioning at their next dental visit.
Are white spots a sign of something serious?
Not always, but sometimes. The key is knowing what to look for so you can tell the difference between a cosmetic issue and an early warning sign.
Likely cosmetic and stable: White marks that have been present since childhood, appear symmetrical across matching teeth, and haven’t changed in size or colour over time are usually fluorosis or enamel hypoplasia. These don’t typically need treatment unless the appearance bothers you.
Worth monitoring: A single white spot on an otherwise healthy tooth, particularly near the gumline, may be early demineralisation. If the surface still feels smooth and there’s no sensitivity, this is the stage where remineralisation strategies can make a real difference. Your dentist can track these with clinical photos at regular check-ups to make sure they’re not progressing.
Book an assessment: If you notice a white spot that feels rough to your tongue, catches food, comes with sensitivity to hot or cold, or has started shifting to brown or grey, the enamel surface has likely broken down. At that point it’s no longer an early warning. It’s a cavity that needs a restoration. The sooner it’s assessed, the more conservative the treatment can be.
The honest answer is that you can’t reliably diagnose the cause of white marks yourself. Photos online make everything look the same. A clinical examination with X-rays tells you what’s actually going on beneath the surface and whether anything needs to happen. Once you know the cause, treatment can be matched to your specific situation.
Why DIY whitening isn't always the right first step?
It’s a reasonable instinct. You see white patches, so you reach for a whitening product to even things out. But bleaching works by lightening the surrounding enamel, which can actually make white spots more obvious in the short term, not less.
More importantly, if the white marks are caused by weakened or demineralised enamel, applying peroxide-based products to an already compromised surface isn’t ideal. You want that enamel assessed and strengthened first, not stripped further.
This doesn’t mean professional teeth whitening is off the table. It can work well as part of a broader plan once the underlying cause is understood and any active enamel issues have been addressed. The order just matters. Diagnose first, then decide on cosmetic steps with your dentist rather than the other way around.
How white spots are treated?
Treatment depends on what’s causing the white marks and how deep the changes go. Your dentist will always start with the most conservative option and only move to more involved treatments if needed.
Remineralisation
For early demineralisation where the enamel surface is still intact, the goal is to put minerals back in and stop the process from progressing. This might include high-concentration fluoride treatments applied in the chair, take-home products containing CPP-ACP (calcium and phosphate compounds, like Tooth Mousse), and adjustments to your oral hygiene and diet. Remineralisation takes time and consistency, but it’s the least invasive path and can make a genuine difference when white spots are caught early.
Resin infiltration
This is a relatively newer option that works well for post-braces white spots and superficial demineralisation. A tooth-coloured resin is applied to the porous enamel, filling in the affected area and blending the colour with the surrounding tooth. There’s no drilling involved, no anaesthetic needed, and it can often be done in a single visit. It won’t help with every type of white spot, but for the right cases it gives a noticeably better cosmetic result with minimal intervention.
Microabrasion
For surface-level discolouration, particularly mild fluorosis, microabrasion gently polishes away a thin outer layer of enamel using a mild abrasive compound. This can reduce or remove shallow white patches without affecting the deeper tooth structure. It’s quick and straightforward, but it only works where the discolouration is confined to the outermost enamel layer.
Composite bonding and tooth-coloured restorations
Where the enamel has broken down into a cavity, or where white marks are too deep for conservative approaches, a tooth-coloured composite restoration can repair the area and restore a natural appearance. This is the same material used in white fillings, shaped and polished to match your surrounding teeth.
Veneers
For significant cosmetic concerns affecting multiple front teeth, porcelain veneers offer a more comprehensive solution. A thin shell is bonded over the front surface of each tooth, covering white patches, uneven colour, and other imperfections in one step. Veneers are a bigger commitment than the options above, so they’re typically considered when conservative approaches haven’t achieved the result you’re after.
Preventing white spots
Better still, some white spots can be avoided altogether. Generic “brush and floss” advice isn’t particularly helpful here, so let’s be more specific.
If your child is in braces or clear aligners or about to start orthodontic treatment, cleaning thoroughly around brackets and wires is the single biggest thing that prevents post-braces white marks. An electric toothbrush and interdental brushes make a real difference. For younger children, supervise brushing and use only a pea-sized amount of age-appropriate fluoride toothpaste. Swallowing excess toothpaste over time is one of the most common causes of mild fluorosis.
Cut back on frequent sipping and snacking on acidic drinks and foods. It’s not about eliminating them entirely, it’s about reducing how often your teeth are exposed throughout the day. Water between meals helps neutralise acid.
If your child breathes through their mouth during sleep or snores regularly, mention it at their next dental or GP visit. Chronic mouth breathing dries out enamel and can contribute to white spot development over time.
When to book an assessment
If you’ve noticed white marks and you’re unsure whether they’re cosmetic or something that needs attention, an examination with X-rays gives you a clear answer. We’ll explain what’s causing them, whether they need treatment or just monitoring, and what your options are if you’d like to improve the appearance.
There’s no judgement in the question and no pressure to commit to treatment on the spot. Book a consultation with our Gisborne team and we’ll take it from there.
Frequently asked questions
It depends on the cause. White marks from temporary enamel dehydration, like sleeping with your mouth open, will typically disappear once saliva rehydrates the tooth surface. Early demineralisation spots can improve with remineralisation strategies such as fluoride treatments and CPP-ACP products, though they may not vanish completely. White marks caused by fluorosis or enamel hypoplasia are permanent structural changes and won’t fade on their own, but cosmetic treatments can reduce their appearance.
They can be. A chalky white spot, particularly near the gumline, is often the earliest visible sign of enamel breakdown. At this stage the surface is still intact and the process may be reversible with the right care. Once the spot feels rough, catches food, or starts changing to brown or grey, the enamel has broken through into a cavity that needs a restoration. That’s why getting white marks assessed early matters.
Not always, and it can sometimes make them more noticeable. Whitening works by lightening the surrounding enamel, which can increase the contrast with the white patches rather than blending them. Professional whitening can still be part of the solution, but it works best when combined with other treatments and after the underlying cause has been assessed. Your dentist can advise on the right sequence for your situation.
Plaque that builds up around orthodontic brackets produces acid against the enamel surface. If cleaning is difficult during treatment, this causes localised demineralisation, leaving white marks in a pattern matching where the brackets sat. It’s one of the most common causes of white spots in teens. Using an electric toothbrush, interdental brushes, and a fluoride rinse during orthodontic treatment significantly reduces the risk.
Many white spots are preventable. Supervise brushing in younger children and use only a pea-sized amount of age-appropriate fluoride toothpaste to reduce the risk of fluorosis. During orthodontic treatment, prioritise thorough cleaning around brackets and wires. Limit frequent snacking on acidic or sugary foods and drinks. And if your child breathes through their mouth during sleep, raise it with your dentist or GP, as chronic mouth breathing can affect enamel development.
If you’ve noticed white marks that are new, changing, rough in texture, or accompanied by sensitivity, book an assessment sooner rather than later. Even if the spots turn out to be cosmetic, a clinical examination with X-rays is the only reliable way to confirm the cause and rule out early decay. The earlier a problem is identified, the more conservative the treatment.
Root canal or implant: what's the difference?
If you’ve been told you need treatment on a damaged or painful tooth, you’re probably weighing up your options. The decision between a root canal and an implant can feel confusing, especially when you’re already uncomfortable. Both are effective, well-established treatments, but they do very different things.
A root canal aims to save your natural tooth by treating infection inside it. A dental implant replaces a tooth that’s already missing or can’t be saved. The right path depends on what’s happening with your specific tooth, its root, and the bone and gum tissue around it.
Your tooth and its root: a quick anatomy refresher
The part of your tooth you can see is the crown, covered in enamel. Beneath that sits dentine, and deep inside is the pulp, a soft tissue containing nerves and blood vessels. The root anchors your tooth into the jawbone.
Infection typically reaches the pulp through deep decay, cracks, trauma, or old fillings that have broken down. Once the pulp is inflamed or infected, you’ll usually know about it. The condition of the root and surrounding bone plays a big role in whether the tooth can be kept or needs to come out.
What is root canal treatment?
Root canal treatment removes infected or inflamed pulp from inside the tooth. The internal canals are cleaned, disinfected, and sealed. The goal is to relieve pain, stop infection spreading, and preserve the tooth and its root in the jaw.
Signs that might point toward a root canal include lingering sensitivity to hot or cold, pain when biting, swelling near the gum, a persistent bad taste, or a tooth that’s darkened after an injury. If you’re experiencing a toothache, a proper assessment is the only way to know whether root canal treatment is needed.
What is a dental implant?
A dental implant is a small titanium post placed into the jawbone to act as a replacement root. Once healed and integrated with the bone, a crown is attached to restore the look and function of a natural tooth.
Implants are considered when a tooth can’t be saved due to severe decay, fracture, or recurring infection that won’t resolve. They’re also used to fill gaps where teeth are already missing, preventing neighbouring teeth from shifting and restoring chewing function. You can learn more about how dental implants work on our dedicated page.
Core differences at a glance
A root canal keeps your natural tooth in place. The internal tissue is removed and sealed, but the tooth structure and root stay. An implant requires extraction first. The tooth is removed, the site heals, and an artificial root and crown take its place.
Root canal treatment typically involves fewer steps and a shorter overall timeline. Implant treatment is staged across multiple appointments over several months, allowing time for bone integration. Neither option is universally better. The right choice depends on the clinical picture and your individual situation.
When saving the tooth makes sense
If enough healthy tooth structure remains above the gumline, the root is intact without severe fractures, and the surrounding bone and gum are stable, a root canal is often the preferred approach. Keeping your natural tooth preserves your bite, your natural feel when chewing, and usually means a shorter treatment timeline.
After root canal treatment, a dental crown is commonly recommended, particularly on back teeth. The treated tooth becomes more brittle over time, and a crown protects it against cracks from biting forces.
When replacing the tooth is the better long-term choice
Sometimes a tooth is too broken down to restore predictably. A vertical crack through the root, extensive decay below the gumline, or infection that persists despite treatment can all shift the recommendation toward extraction and replacement.
An implant provides stable chewing function once fully healed and doesn’t rely on neighbouring teeth for support. Suitability depends on bone volume, gum health, general medical history, and a commitment to ongoing oral hygiene. Smoking and certain health conditions can affect healing, so these are discussed during assessment.
What does treatment actually involve?
Root canal: what to expect
Your dentist examines the tooth and takes X-rays to assess the root and the extent of infection. The area is numbed for comfort. The infected pulp is then carefully removed, the canals are cleaned and shaped, and a filling material seals them. A temporary restoration may be placed before your final crown or filling at a follow-up visit.
If you’re nervous, let the team know. Sleep dentistry and sedation options are available for patients who need extra support during treatment. Treatment is paced gently with breaks when needed, and everything is explained clearly as you go.
Dental implant: what to expect
The process begins with detailed imaging to plan the implant position. If the damaged tooth is still present, it’s extracted first. The implant post is placed into the jawbone during a surgical appointment. A healing period follows, usually a few months, while the bone integrates around the implant. Once stable, an abutment and custom crown are fitted.
Timeframes vary depending on healing, bone levels, and complexity. Tenderness and swelling after surgery are normal. If anything feels unusual during recovery, contact your dentist rather than waiting it out.
Recovery and comfort: honest answers
Modern anaesthesia means both procedures are comfortable during treatment. For patients who feel uneasy, happy gas (nitrous oxide) offers a mild, fast-acting option that wears off quickly after the appointment. After a root canal, mild soreness is common for a few days. Most people return to their normal routine quickly, though temporary bite sensitivity can occur.
Implant recovery involves surgical site tenderness and some swelling. Because the treatment is staged, you’ll have a longer overall healing period. Depending on whether extraction happened at the same appointment, downtime can vary. Don’t push through unusual pain. A prompt check is always better than guessing.
How long does each treatment last?
Both root canals and implants can last many years with the right case selection and proper care. A root canal’s longevity depends on the quality of the final restoration, how much force the tooth handles daily, and whether grinding or clenching is a factor. Ongoing decay risk around the crown or filling matters too.
Implant longevity relies on healthy gums around the implant site, consistent daily cleaning, and regular professional maintenance. Medical and lifestyle factors that affect bone stability also play a role. Long-term success with either treatment isn’t just about the procedure itself. It’s about what happens afterwards.
Cost, value, and time
Root canal treatment plus a crown is generally a lower upfront cost than an implant. Implant treatment involves surgical components, custom parts, and multiple stages, making it a larger financial commitment.
Time investment differs too. Root canal treatment is often completed over two to three visits. Implant treatment spans several months from start to finish. Flexible payment options can help you plan treatment at a pace that works for your budget.
Choosing what's right for your tooth
If the tooth and its root can be predictably restored, a root canal preserves what you already have. If the tooth can’t be saved, an implant provides a strong, natural-looking replacement. You’re not expected to figure this out on your own. A thorough assessment and clear, honest advice from your dentist make the decision much simpler. If you’re unsure where to start, book a consultation and we’ll talk through your options together.
Common questions
Can I choose an implant instead of a root canal?
Sometimes, yes. But if a tooth has a good chance of being saved predictably, preserving it is usually considered first. Extraction is irreversible, and natural teeth have advantages that implants can’t fully replicate. The choice should be guided by prognosis, not just preference.
Do I always need a crown after a root canal?
Back teeth almost always benefit from a crown because they handle strong biting forces. Front teeth may not always need one, depending on how much tooth structure remains. Your dentist will recommend what’s appropriate based on the tooth’s position and condition.
What if a root canal fails later?
Re-treatment is sometimes possible. If the tooth still can’t be saved, extraction and replacement options, including an implant, would be discussed at that point.
Am I suitable for an implant?
Suitability depends on gum health, bone volume, oral hygiene habits, and your medical history. If bone loss is present, options to address it may exist. These details are assessed confidentially during a consultation.
How much does a tooth extraction cost in Australia?
There’s no single answer. The cost of having a tooth removed depends on which tooth it is, how complex the removal turns out to be, what imaging is needed beforehand, and which comfort options you choose. You’ll only get an accurate figure after an examination and X-rays.
As a rough guide, a straightforward removal where the tooth is visible and comes out in one piece tends to sit in the low hundreds per tooth. Surgical extractions, where the tooth is broken, impacted, or needs to be sectioned, cost more and can run into several hundred dollars or beyond. Wisdom teeth and molars frequently sit at the higher end because of their root anatomy and difficult access.
We believe you deserve a clear breakdown before any treatment starts, along with honest advice about whether the tooth actually needs to come out at all.
Why extraction pricing feels confusing
People search for this information in dozens of ways, from “take out teeth price” to “wisdom tooth price,” but they’re all asking the same core question. The confusion is understandable because a tooth extraction isn’t one standardised procedure. A simple removal and a surgical extraction involve different steps, different time, and different clinical risk.
Two patients with the same tooth can face very different costs. One might have straight roots and healthy bone. The other might have curved roots, infection, or a tooth broken below the gumline. Your dentist should explain exactly why your case costs what it does before picking up any instruments.
What you're paying for
The fee covers more than the few minutes the tooth is being removed. It includes a clinical assessment to confirm extraction is the right call, diagnostic imaging to map out root shape and nearby structures, local anaesthetic and pain management, the procedure itself with all sterile instruments and clinical time, and aftercare guidance to keep healing on track. If a review appointment is needed, that’s part of the process too.
The biggest factors that affect cost
Simple versus surgical extraction
This is the main cost driver. A simple extraction means the tooth is visible, intact, and can be gently loosened and lifted out. A surgical extraction may require a small incision into the gum, removal of surrounding bone, or cutting the tooth into sections. More steps mean more time, more skill, and a higher fee.
Which tooth is involved
Front teeth typically have a single root and are easier to access. Molars have two or three roots, sit in thicker bone, and are harder to reach. That’s why molar extraction costs tend to run higher. Wisdom teeth can be partially erupted, fully buried in bone, or angled sideways, all of which push the complexity up further.
Tooth condition
A tooth broken at the gumline usually needs a surgical approach even if it would otherwise have been straightforward. Active infection can change the timing and pain management plan. Swelling or limited mouth opening adds difficulty for both the dentist and the patient.
Root shape and proximity to nerves or sinuses
Curved or divergent roots make removal slower and more involved. Lower wisdom teeth can sit close to the inferior alveolar nerve. Upper back teeth may be near the sinus floor. Good imaging before the procedure reduces surprises and keeps things safer.
Imaging requirements
Most extractions need at least a digital X-ray. For wisdom teeth or complex cases, an OPG provides a broader view of root position, nerve proximity, and bone levels. We have in-house OPG facilities, so you won’t need a separate radiology appointment just for an X-ray.
Comfort and anxiety support
Local anaesthetic is standard. For patients who are nervous, comfort measures like calm explanations, breaks during the procedure, ceiling-mounted TVs, and noise-cancelling headphones can make a real difference. Some sedation options may change the overall fee, and your dentist can talk through what suits you. For mild nerves, happy gas (nitrous oxide) is a popular option. It takes effect within minutes, wears off quickly, and most patients can drive themselves home afterwards. For more significant anxiety or complex procedures, sleep dentistry and sedation options allow you to feel deeply relaxed or even be fully asleep during treatment. Your dentist can talk through which approach suits your situation, and any sedation options will be factored into your cost estimate upfront.
Wisdom teeth: what changes the cost
An erupted wisdom tooth that’s accessible and has cooperative roots can be relatively straightforward. A fully impacted wisdom tooth lying sideways in the jawbone is a different story. The angle, depth, number of teeth removed in one visit, and relationship to the nerve or sinus all influence the price. An OPG is almost always recommended for planning wisdom tooth removal safely.
Can you avoid an extraction?
Saving a tooth is always the first priority where it’s realistic. Depending on the problem, alternatives might include a filling for manageable decay, a crown for a heavily damaged but restorable tooth, root canal treatment for an infected nerve, or gum treatment for periodontal disease. But when a tooth is severely broken, repeatedly infected, or structurally beyond repair, extraction is often the kinder and safer option.
What to expect at a cost estimate appointment
You’ll have a judgement-free conversation about your symptoms, dental history, and any concerns, including anxiety. The dentist will examine the tooth and surrounding structures, take X-rays or an OPG if needed, and then explain whether extraction is recommended and why. You’ll hear what type of extraction it’s likely to be, what’s included in the fee, and what recovery looks like. No surprises.
After the tooth is out: replacement options
Not every extracted tooth needs replacing. Wisdom teeth almost never do. But for teeth that affect your bite, appearance, or the alignment of neighbouring teeth, replacement options include dental implants, bridges, or partial dentures. Each has different costs and timelines, and your dentist can outline what makes sense for your situation.
Healing and aftercare
The first 48 hours
Bite on gauze to manage bleeding, rest with your head elevated, and stick to soft, cool foods. Avoid smoking, vigorous rinsing, spitting, and drinking through straws. Cold packs in short intervals help control swelling.
Dry socket
This happens when the protective blood clot dislodges too early, exposing bone and causing significant pain. Smoking, suction actions, and poor aftercare increase the risk. If pain worsens a few days after the extraction, or you notice a bad taste, contact the clinic.
When to seek urgent help
Bleeding that won’t slow with pressure, increasing swelling or fever, escalating pain after initial improvement, or numbness that persists longer than expected all warrant a call to the clinic straight away.
Payment and affordability
Ask about costs upfront. There’s no judgement in the question. We offer on-the-spot health fund claiming through HICAPS, and flexible payment options including Afterpay and Zip Money where suitable. It’s worth checking with your health fund about expected rebates, since coverage varies by policy, item number, and annual limits.
If you think you need a tooth removed
Don’t sit on escalating pain, swelling, or a broken tooth. The most useful next step is an assessment with X-rays so you get a clear plan and an honest cost breakdown tailored to your situation. Book a consultation with our Gisborne team and we’ll take it from there.
Frequently asked questions
It depends on whether the extraction is simple or surgical, which tooth is involved, and what imaging is needed. An examination is the only way to give you an accurate figure.
Molars have more roots, sit in denser bone, and are harder to access. These factors add clinical time and complexity.
Not necessarily. An erupted wisdom tooth with straightforward roots can be comparable to other extractions. Impacted or awkwardly positioned wisdom teeth typically cost more.
It often reduces your out-of-pocket cost, but the amount depends on your level of cover, waiting periods, and annual limits. Confirm with your fund and bring the itemised estimate.
Local anaesthetic means you should feel pressure rather than pain. If you’re anxious, let the team know. They can go at your pace and focus entirely on keeping you comfortable.
Many people return within a day or two after a simple extraction. Surgical or wisdom tooth removal may need a longer recovery window depending on swelling and discomfort.
Source:
(1), (2), (3)
Centers for Disease Control and Prevention (CDC) – Cavities and tooth decay; role of bacteria, sugar, and acids
https://www.cdc.gov/oral-health/about/cavities-tooth-decay.html
(4), (5)
World Health Organization (WHO) – Oral health overview, prevalence, and prevention
https://www.who.int/news-room/fact-sheets/detail/oral-health
(6), (7)
Featherstone, J.D.B. – The dynamic process of dental caries and early reversibility
Journal of the American Dental Association
https://jada.ada.org/article/S0002-8177(14)00021-0/fulltext
(8), (9)
Buzalaf, M.A.R. et al. – Fluoride, remineralisation, and caries prevention
Healthcare (MDPI)
https://www.mdpi.com/2227-9032/13/17/2246
(10)
National Institute of Dental and Craniofacial Research (NIDCR) – Tooth decay basics
https://www.nidcr.nih.gov/health-info/tooth-decay
(11), (12)
Pitts, N.B. et al. – Dental caries stages and progression
Nature Reviews Disease Primers
https://www.nature.com/articles/nrdp201530
(13), (14)
Zero, D.T. – Dental caries process and dentin involvement
Dental Clinics of North America
https://pubmed.ncbi.nlm.nih.gov/15172607/
(15)
National Health Service (NHS, UK) – Advanced tooth decay and symptoms
https://www.nhs.uk/conditions/tooth-decay/
(16), (17)
Centers for Disease Control and Prevention (CDC) – Fluoride and enamel protection
https://www.cdc.gov/oral-health/prevention/about-fluoride.html
(18)
World Health Organization (WHO) – Fluoride use and remineralisation guidance
https://www.who.int/publications/i/item/WHO-NMH-NHD-17.12
(19), (20)
National Institute of Dental and Craniofacial Research (NIDCR) – Oral hygiene and decay prevention
https://www.nidcr.nih.gov/health-info/preventing-cavities
(21), (22)
Centers for Disease Control and Prevention (CDC) – Brushing, flossing, plaque control
https://www.cdc.gov/oral-health/prevention/index.html
(23)
World Health Organization (WHO) – Sugar intake and oral health
https://www.who.int/publications/i/item/WHO-NMH-NHD-15.4
(24)
National Health Service (NHS, UK) – Dental check-ups and prevention
https://www.nhs.uk/live-well/healthy-teeth-and-gums/dental-check-ups/
(25), (26)
Centers for Disease Control and Prevention (CDC) – Early detection and preventive dental care
https://www.cdc.gov/oral-health/prevention/index.html
(27)
World Health Organization (WHO) – Professional cleaning and plaque management
https://www.who.int/publications/i/item/WHO-NMH-NHD-17.12
(28), (29)
Featherstone JDB; Pitts NB et al. – Irreversible enamel loss and cavity formation
https://jada.ada.org/article/S0002-8177(14)00021-0/fulltext
https://www.nature.com/articles/nrdp201530
(30)
National Health Service (NHS, UK) – Treatment for advanced decay
https://www.nhs.uk/conditions/tooth-decay/
(31), (32)
Centers for Disease Control and Prevention (CDC) – Benefits of regular dental visits
https://www.cdc.gov/oral-health/prevention/index.html
(33)
World Health Organization (WHO) – Preventive dental care and long-term oral health
https://www.who.int/news-room/fact-sheets/detail/oral-health
Tooth decay often starts long before you feel it
Tooth decay is one of the most common oral health problems, but it does not always mean you need a filling straight away. In many cases, decay begins quietly, long before there is pain or visible damage. Early changes can happen on the surface of the tooth without you noticing anything at all.
At this early stage, minerals are gradually lost from the enamel, weakening it over time. Research shows that when this process is detected early enough, it may be possible to stop or reverse the damage before a cavity forms. This relies on good oral hygiene, fluoride exposure, and regular dental care.
However, once decay progresses and a hole forms in the tooth, the damage becomes permanent and treatment is required. Understanding how tooth decay starts, and when it can still be managed conservatively, highlights why early dental visits and preventive care play such an important role in protecting your teeth.
What is tooth decay?
Tooth decay begins with plaque, a sticky film of bacteria that naturally forms on teeth throughout the day. These bacteria use sugars and starches from food and drinks as their energy source. As they break these sugars down, they release acids that sit on the tooth surface and start to weaken the enamel (1).
Enamel is the hardest substance in the human body, but it is not indestructible. Repeated acid exposure causes minerals such as calcium and phosphate to be pulled out of the enamel, a process known as demineralisation (2). This does not happen all at once. It occurs gradually, especially when sugary or acidic foods are consumed frequently rather than just occasionally.
Time plays an important role. After eating or drinking sugar, the mouth becomes more acidic for around 20 to 60 minutes. If this happens often, the enamel does not have enough time to recover between acid attacks (3). Over time, the enamel becomes thinner and weaker, even if there is no pain.
Saliva helps protect teeth by washing away acids and supplying minerals back to the enamel (4). However, when acid attacks are too frequent or oral hygiene is poor, saliva alone may not be enough to prevent damage. If demineralisation continues unchecked, the enamel eventually breaks down, forming a cavity that requires dental treatment (5).
What does “reversing a cavity” actually mean?
When people talk about reversing a cavity, they are usually referring to early tooth decay, not a hole in the tooth. At this stage, the enamel has started to lose minerals, but the surface of the tooth is still intact. There is no physical cavity yet, even though damage has begun beneath the surface (6).
In this early phase, the tooth still has the ability to repair itself. Minerals such as calcium and phosphate can be redeposited into weakened enamel through a natural repair process known as remineralisation (7). This process is supported by saliva and strengthened by fluoride, which helps rebuild enamel and makes it more resistant to future acid attacks (8).
This is why dentists often talk about “reversing” decay rather than curing a cavity. Once a visible hole forms in the tooth, enamel and tooth structure are permanently lost; there’s no curing something that isn’t technically there anymore. At that point, remineralisation is no longer possible, and the decay must be removed and restored with dental treatment such as a filling (9).
Early decay can be difficult to spot without a dental examination. It may appear as a faint white stain or chalky area on the tooth, or it may not be visible at all. Because there is usually no pain at this stage, many people are unaware that decay has started (10).
Understanding this difference helps explain why early detection is so important. Reversal is only possible during a limited window, before the tooth structure breaks down.
The stages of tooth decay
Tooth decay does not happen all at once. It develops in stages, and the earlier it is identified, the more options there are to manage it conservatively (11).
The first stage is demineralisation. At this point, acids from plaque begin to remove minerals from the enamel. This often appears as a white or chalky patch on the tooth surface and usually causes no pain (12). Because the enamel is still intact, this stage may be reversible with the right care.
If mineral loss continues, the tooth enters the enamel decay stage. The enamel surface starts to weaken and break down. Small cavities may form, even though discomfort is still minimal or absent (13). Once the enamel structure is damaged, the tooth cannot repair itself, and dental treatment is typically needed.
As decay progresses deeper, it reaches the dentin, the softer layer beneath the enamel. Dentin is less resistant to acid, so decay spreads more quickly at this stage. Sensitivity to hot, cold, or sweet foods often begins here (14).
In the final stage, decay reaches the pulp, where the nerves and blood supply of the tooth are located. This can cause significant pain, infection, or abscess formation and may require root canal treatment or tooth removal if left untreated (15).
Understanding these stages highlights why early dental visits are so important. Treating decay early can mean simpler care and better long-term outcomes
How early tooth decay can be reversed
Early tooth decay can sometimes be reversed by helping the enamel regain the minerals it has lost, as long as there is no hole in the tooth (16). At this stage, the enamel is weakened but still intact, which means repair is possible with the right care.
Fluoride plays a key role in this process. It helps minerals such as calcium and phosphate move back into the enamel and makes the tooth surface more resistant to future acid attacks (17). This is why fluoride toothpaste and professional fluoride treatments are commonly recommended for early decay.
Saliva also supports enamel repair by neutralising acids and supplying essential minerals (18). Good daily habits matter too. Brushing twice a day with fluoride toothpaste, cleaning between teeth, and reducing how often sugary foods and drinks are consumed all help limit acid exposure and support remineralisation (19, 20).
Reversal takes time and works best when early decay is monitored by a dentist to ensure it does not progress.
What helps prevent tooth decay from progressing
Preventing tooth decay from getting worse is often about consistency rather than drastic changes. One of the most effective steps is maintaining a regular oral hygiene routine. Brushing twice a day with fluoride toothpaste helps remove plaque and strengthens enamel against acid attacks (21). Cleaning between teeth daily is just as important, as decay often begins in areas a toothbrush cannot reach (22).
Diet also plays a major role. It is not only how much sugar you consume, but how often. Frequent snacking on sugary or acidic foods causes repeated drops in mouth pH, giving enamel less time to recover between acid attacks (23). Reducing how often these foods and drinks are consumed can significantly lower the risk of decay progression.
Regular dental check-ups are another key factor. Early decay can be monitored, treated with preventive measures, or stabilised before it turns into a cavity (24). Professional advice allows care to be tailored to your individual risk factors.
Together, good daily habits and routine dental visits provide the best protection against tooth decay becoming a more serious problem.
When a cavity cannot be reversed
Once tooth decay has progressed beyond the enamel and caused a physical hole in the tooth, it can no longer be reversed naturally (28). At this stage, enamel and tooth structure have been permanently lost. Bacteria can continue to spread deeper into the tooth, reaching the dentin and potentially the pulp if left untreated (29).
When this happens, dental treatment is needed to remove the decay and restore the tooth. Delaying care can allow the damage to worsen, increasing the risk of pain, infection, and more complex procedures such as root canal treatment or crowns (30). Treating decay early helps preserve more of the natural tooth and reduces the chance of complications.
Why regular dental visits matter
Regular dental visits help identify tooth decay before it becomes irreversible. Early decay often causes no pain, which makes it easy to miss without a professional examination (31). Dental check-ups allow weak areas in enamel to be detected early, when preventive care can still be effective (32). Professional cleans also reduce plaque and bacteria that contribute to acid damage (33). Regular visits support early action and long-term oral health.
Frequently asked questions
Only very early tooth decay can be reversed. This means the enamel has weakened but there is no hole in the tooth yet. Once a cavity forms, dental treatment is required.
Early decay often causes no pain and may appear as a white or chalky spot on the tooth. In many cases, it can only be detected during a dental examination.
Fluoride does not repair holes, but it helps weakened enamel regain minerals and become more resistant to acid, which can stop early decay from progressing.
White spots can be an early sign of enamel demineralisation. With proper care and monitoring, they may improve over time.
In some cases, early decay in children can be stabilised or reversed, but it depends on the stage of decay and oral hygiene habits.
If early decay is left untreated, it can progress into a cavity, leading to pain, infection, and more complex dental treatment.
Source:
(1), (2), (3)
Centers for Disease Control and Prevention (CDC) – Cavities and tooth decay; role of bacteria, sugar, and acids
https://www.cdc.gov/oral-health/about/cavities-tooth-decay.html
(4), (5)
World Health Organization (WHO) – Oral health overview, prevalence, and prevention
https://www.who.int/news-room/fact-sheets/detail/oral-health
(6), (7)
Featherstone, J.D.B. – The dynamic process of dental caries and early reversibility
Journal of the American Dental Association
https://jada.ada.org/article/S0002-8177(14)00021-0/fulltext
(8), (9)
Buzalaf, M.A.R. et al. – Fluoride, remineralisation, and caries prevention
Healthcare (MDPI)
https://www.mdpi.com/2227-9032/13/17/2246
(10)
National Institute of Dental and Craniofacial Research (NIDCR) – Tooth decay basics
https://www.nidcr.nih.gov/health-info/tooth-decay
(11), (12)
Pitts, N.B. et al. – Dental caries stages and progression
Nature Reviews Disease Primers
https://www.nature.com/articles/nrdp201530
(13), (14)
Zero, D.T. – Dental caries process and dentin involvement
Dental Clinics of North America
https://pubmed.ncbi.nlm.nih.gov/15172607/
(15)
National Health Service (NHS, UK) – Advanced tooth decay and symptoms
https://www.nhs.uk/conditions/tooth-decay/
(16), (17)
Centers for Disease Control and Prevention (CDC) – Fluoride and enamel protection
https://www.cdc.gov/oral-health/prevention/about-fluoride.html
(18)
World Health Organization (WHO) – Fluoride use and remineralisation guidance
https://www.who.int/publications/i/item/WHO-NMH-NHD-17.12
(19), (20)
National Institute of Dental and Craniofacial Research (NIDCR) – Oral hygiene and decay prevention
https://www.nidcr.nih.gov/health-info/preventing-cavities
(21), (22)
Centers for Disease Control and Prevention (CDC) – Brushing, flossing, plaque control
https://www.cdc.gov/oral-health/prevention/index.html
(23)
World Health Organization (WHO) – Sugar intake and oral health
https://www.who.int/publications/i/item/WHO-NMH-NHD-15.4
(24)
National Health Service (NHS, UK) – Dental check-ups and prevention
https://www.nhs.uk/live-well/healthy-teeth-and-gums/dental-check-ups/
(25), (26)
Centers for Disease Control and Prevention (CDC) – Early detection and preventive dental care
https://www.cdc.gov/oral-health/prevention/index.html
(27)
World Health Organization (WHO) – Professional cleaning and plaque management
https://www.who.int/publications/i/item/WHO-NMH-NHD-17.12
(28), (29)
Featherstone JDB; Pitts NB et al. – Irreversible enamel loss and cavity formation
https://jada.ada.org/article/S0002-8177(14)00021-0/fulltext
https://www.nature.com/articles/nrdp201530
(30)
National Health Service (NHS, UK) – Treatment for advanced decay
https://www.nhs.uk/conditions/tooth-decay/
(31), (32)
Centers for Disease Control and Prevention (CDC) – Benefits of regular dental visits
https://www.cdc.gov/oral-health/prevention/index.html
(33)
World Health Organization (WHO) – Preventive dental care and long-term oral health
https://www.who.int/news-room/fact-sheets/detail/oral-health
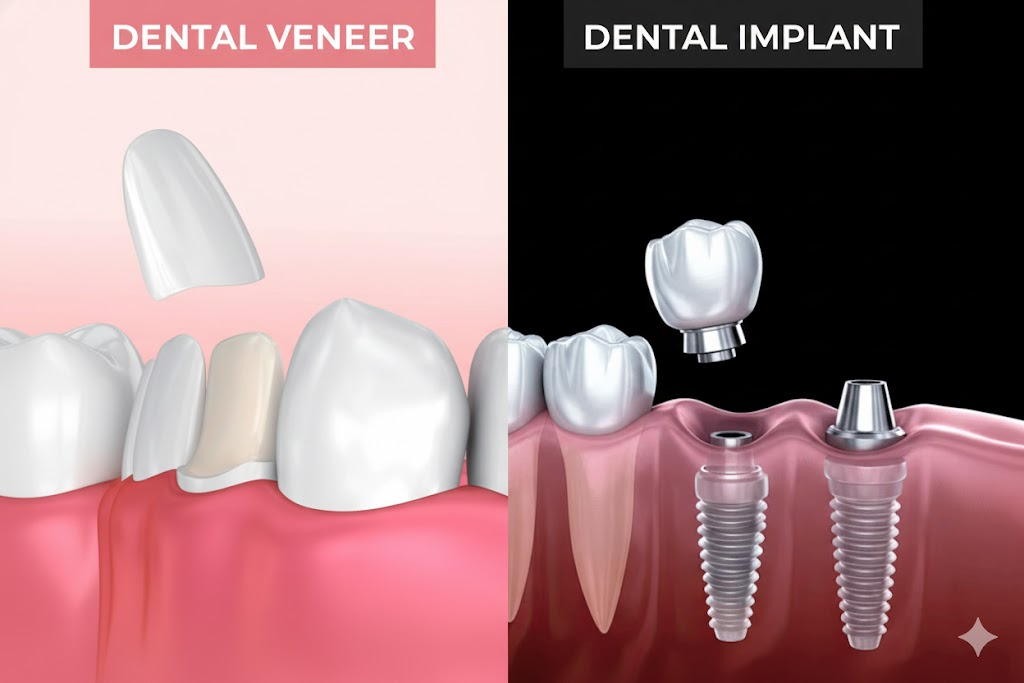
Choosing between veneers and dental implants can feel overwhelming for patients who aren’t completely savvy with their choices, especially when you just want a healthy, confident smile. Both options can transform the way your teeth look, but they work in very different ways and suit different situations. In this article, we will walk you through what veneers and implants are, how they differ, and how the team at Gisborne Family Dental can help you decide what is right for you.
Why your choice between veneers and implants matters
Veneers and dental implants can both improve your smile, but they are not interchangeable. Each option solves a different type of problem, involves a different level of treatment, and has its own costs and benefits over time.
Choosing the right treatment matters because it can affect:
- How natural your smile looks
- How long your results are likely to last
- Whether healthy tooth structure needs to be removed
- How your bite and jaw feel when you eat and speak
- Your overall treatment cost and healing time
If you pick a cosmetic option when a tooth actually needs full replacement, you may still face ongoing problems. On the other hand, choosing a more complex treatment than you really need can mean extra time and expense.
Understanding the key differences between veneers and implants helps you have a clearer conversation with your dentist, so together you can choose the option that fits your mouth, your goals and your lifestyle.
How veneers and dental implants work
How veneers work
Veneers are thin shells that are bonded to the front surface of a tooth to change how it looks. They are usually made from porcelain or composite resin.
From a clinical point of view, traditional porcelain veneers involve a small amount of tooth preparation. In most cases, about 0.5 to 0.7 millimetres of enamel is removed from the front of the tooth, which is roughly the thickness of a fingernail, so that there’s room to bond the veneer without adding unflattering bulk to the tooth front
Key steps usually include:
- Assessment of the tooth and surrounding tissues
- Careful preparation of the enamel, usually kept within enamel to protect the tooth and support bonding
- An impression or digital scan to design the veneer
- Try in and adjustment of the veneer
- Final bonding and polishing
Minimal prep or no prep veneers may use even thinner porcelain, sometimes around 0.2 to 0.5 millimetres, which can reduce or avoid the need for enamel removal in selected cases.
Veneers are generally used when:
- The tooth is present and structurally sound
- The concern is colour, minor shape issues or small gaps
- There is no need to replace the root or the whole tooth
How dental implants work
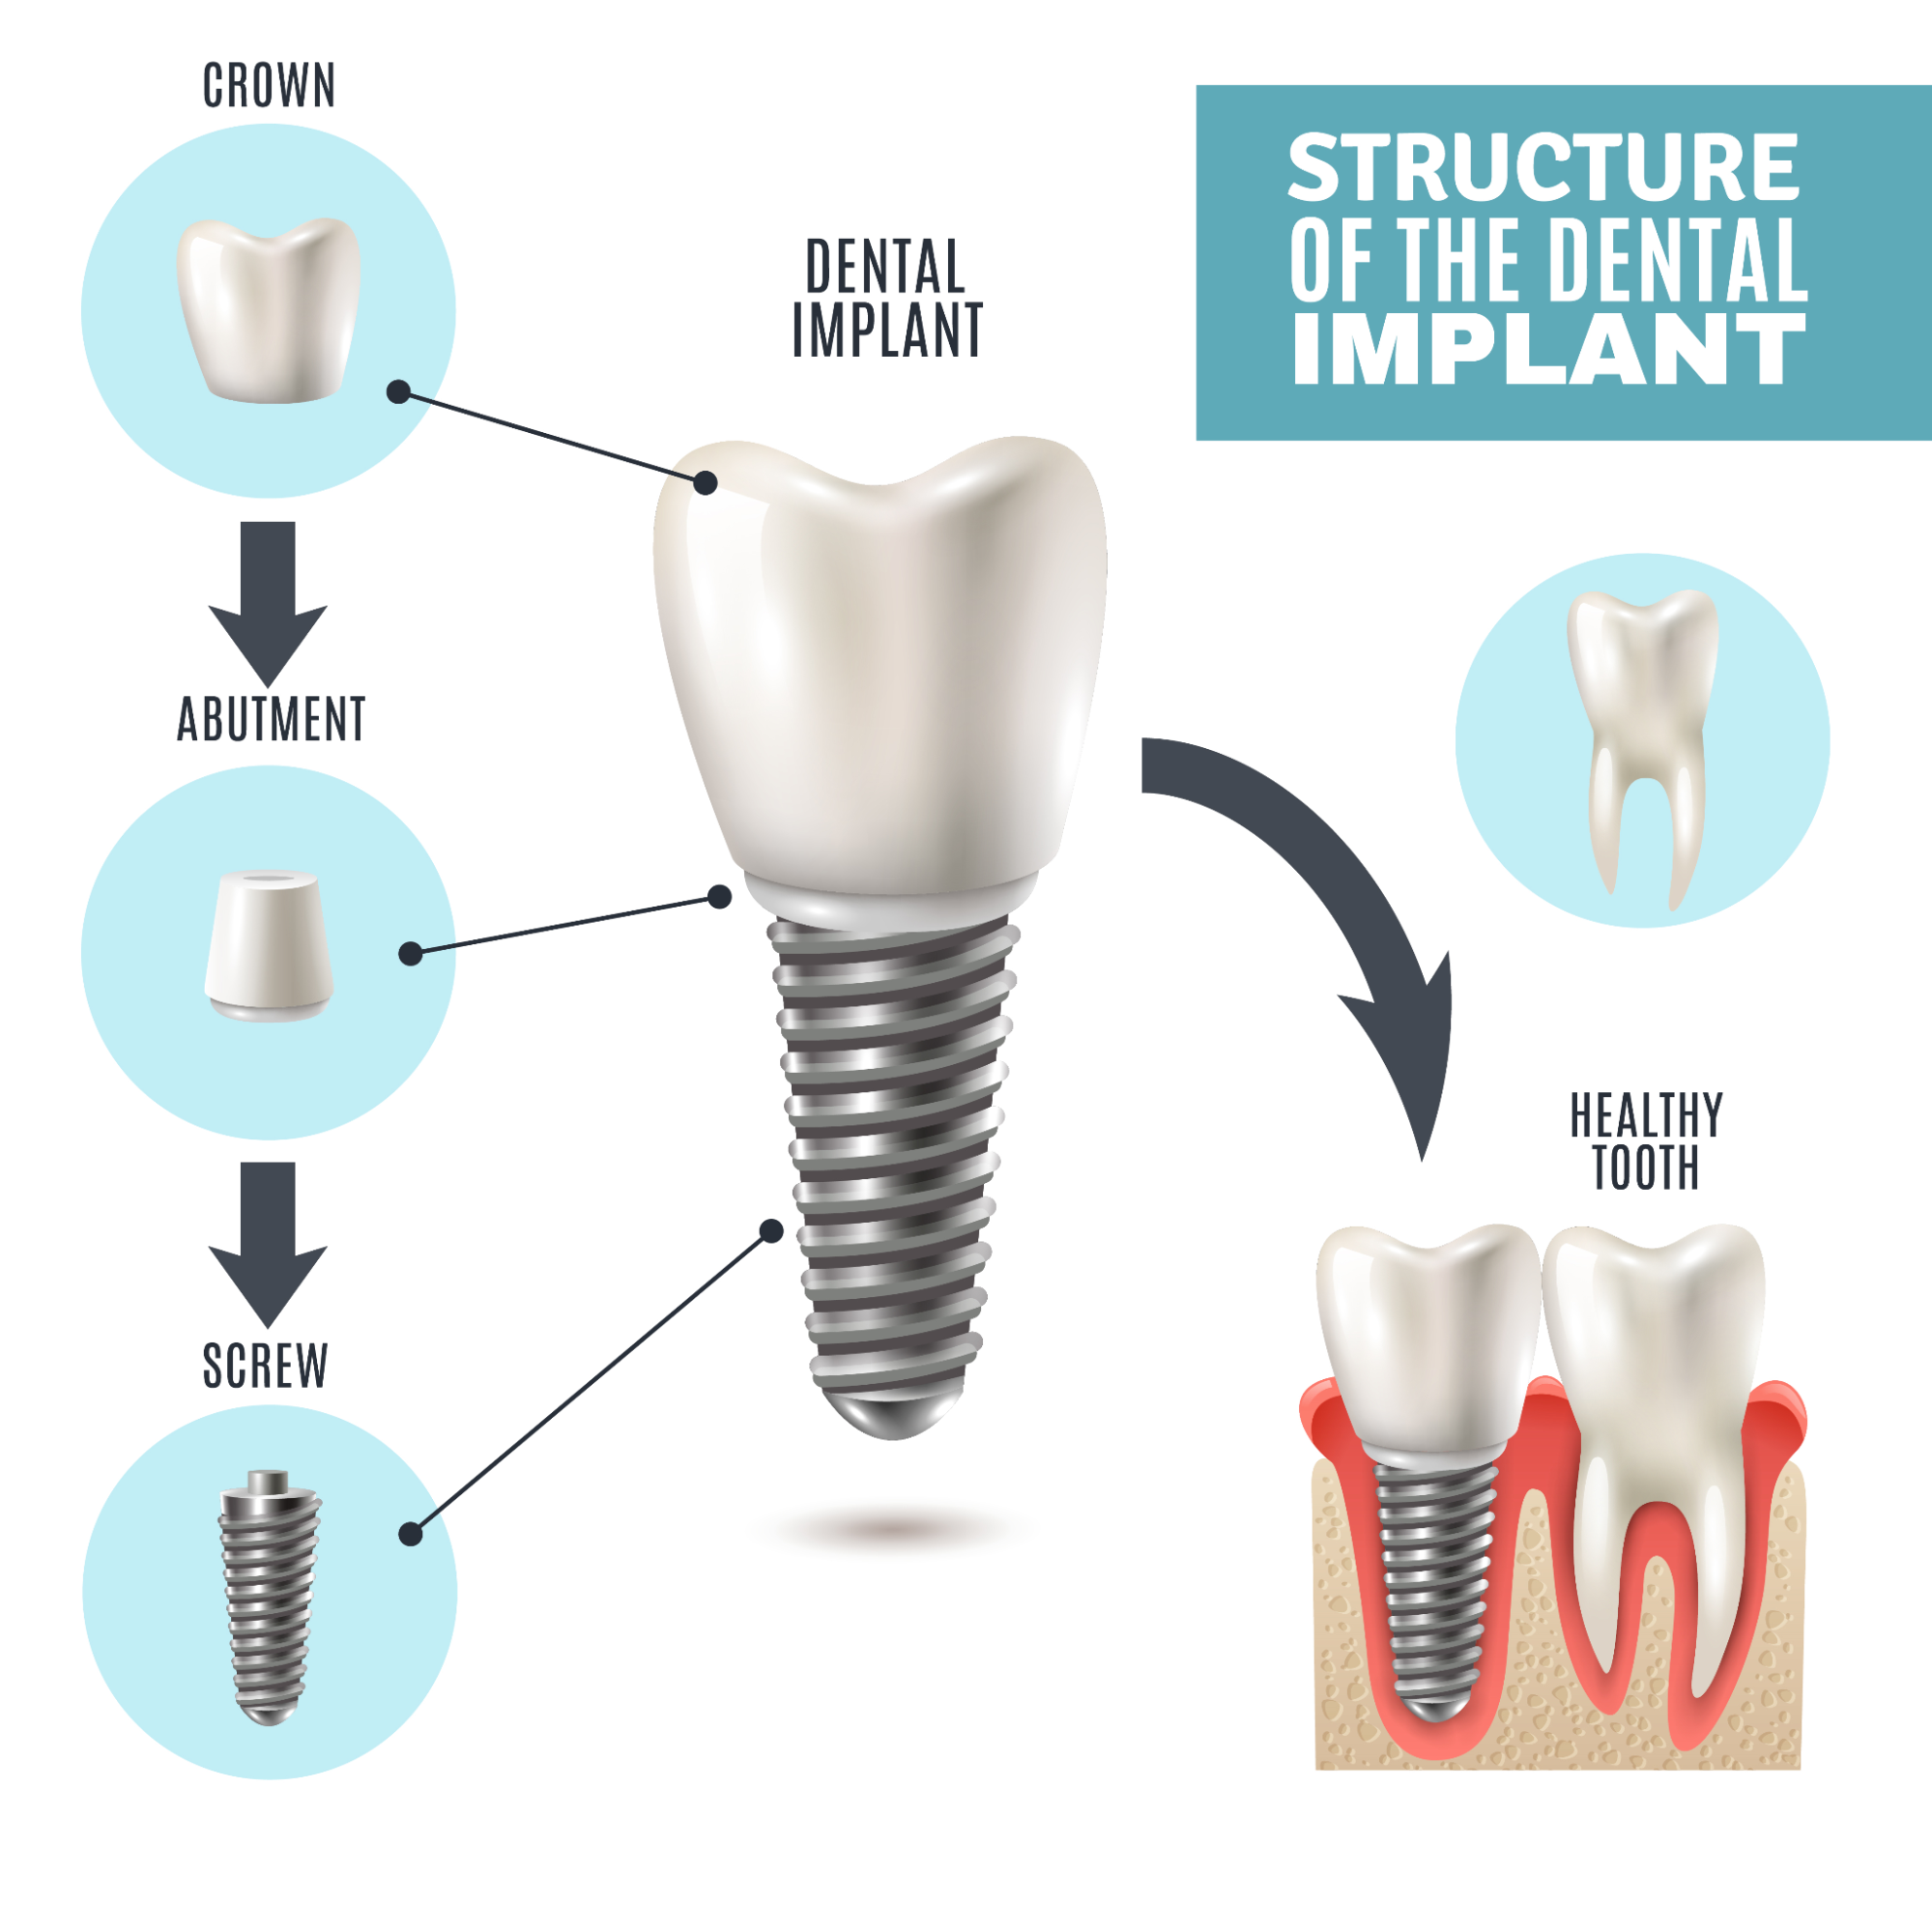
Dental implants are used to replace missing teeth, or teeth that cannot be saved. An implant replaces the root, and then supports a crown, bridge or denture.
A standard single implant has three parts:
- A titanium fixture placed into the jaw bone
- An abutment that connects the fixture to the restoration
- A crown that appears above the gum and looks like a tooth
Treatment usually occurs in stages:
- Planning with clinical examination and imaging such as X rays or CBCT
- Placement of the implant into the bone under local anaesthetic
- Healing phase, often several months, while bone integrates with the implant
- Restoration, where an abutment and crown are fitted and adjusted
Modern implant systems show high survival rates. Many studies report around 90 to 95 per cent survival at 10 years, and some report function extending beyond 20 years when cases are well planned and maintained.
Implants are generally preferred when:
- A tooth is missing or needs to be removed
- The patient wants a fixed option rather than a removable denture
- There is enough healthy bone, or bone can be augmented
How dentists decide between veneers and implants
From a clinical point of view, the starting question is simple: is the tooth still restorable or not?
If the tooth is present, structurally sound and free of severe cracks or infection, veneers and other conservative options can usually be considered. If the tooth is missing or cannot be predictably restored, replacement options such as implants come into the picture.
When assessing a tooth, dentists typically look at:
- Tooth structure
- Is there enough healthy enamel and dentine left to support a veneer or crown?
- Has the tooth had large fillings, root canal treatment or fractures below the gum line?
- Gum and bone health
- Are the gums stable, with no untreated periodontal disease?
- Around implants, long term success depends on having enough healthy bone and low inflammation.
- Poorly controlled gum disease increases the risk of both veneer failure and implant complications.
- Bite and function
- Are there heavy bite forces, clenching or grinding (bruxism)?
- Veneers on patients with strong grinding habits can chip or debond more often.
- Implants in very heavy bite situations may need careful design, night splints or alternative options.
- Aesthetic goals
- Is the concern one or two teeth, or the entire visible smile line?
- Veneers can be planned in sets (for example 4, 6 or 8 teeth) to create a harmonised appearance.
- An implant crown must blend with neighbouring teeth in shape, colour and gum line.
- Time and tolerance for treatment
- Veneers often involve fewer appointments and no surgical phase.
- A single implant can involve several months from placement to final crown, especially if bone grafting is required.
- Some patients strongly prefer to avoid surgery, while others prioritise a fixed replacement over a removable option.
- Cost over a lifetime
This is not just the initial fee for veneers or implants. It includes how long each option lasts, how often it needs replacement and any extra treatment required along the way.
Veneers usually cost less at the start, but they often need to be replaced every 7 to 15 years. Some last longer, but others may fail sooner if the bite is heavy or the underlying tooth changes. Each replacement involves new laboratory work, new bonding and careful colour matching. If someone has 4, 6 or 8 veneers, the long term cost increases because replacing one can mean adjusting neighbouring veneers to keep the smile consistent.
Implants cost more upfront because they involve planning, surgery and a custom crown. However, the implant fixture itself can last decades. Most research shows around 90 to 95 per cent survival at 10 years when maintained well. What usually needs replacement is the implant crown, often after 10 to 15 years, which is generally less costly than replacing multiple veneers.
Over 20 to 30 years, a single veneer can be cheaper than an implant if the tooth is strong and stable. For missing teeth, a single implant often becomes more cost effective than repeated removable options or multiple veneer cycles.
In many cases, both options are not truly interchangeable. For example, a missing upper front tooth is usually better restored with an implant, bridge or denture rather than a veneer, because there is no tooth left to bond to. On the other hand, a discoloured but solid front tooth is often better treated with a veneer or crown rather than extraction and implant placement.
From a clinical point of view, veneers and dental implants are very different tools. Veneers are usually used to improve the appearance of teeth that are still present and structurally sound. Implants are used to replace teeth that are missing or cannot be predictably restored.
There is no single option that is “better” for everyone. The most suitable treatment depends on:
- The condition of the tooth and surrounding bone
- Your bite, jaw joints and any grinding or clenching
- Your medical history and gum health
- How many teeth are involved and where they sit in the smile
- Your expectations about appearance, time and maintenance
A thorough examination allows a dentist to explain which options are realistic in your case, along with the likely benefits, risks and long term outlook for each.
When discussing veneers or implants with a dentist, it can be helpful to ask:
- What are all the reasonable options for this tooth or area?
- How long is each option expected to last in my situation?
- What maintenance will I need over time?
- What are the main risks or limitations of each option for me?
Veneers may NOT be suitable if:
- There is active bruxism without management
- Enamel is severely worn or missing
- Gum recession creates uneven margins
- The tooth is severely rotated or misaligned (orthodontics may be needed first)
Implants may NOT be suitable if:
- Bone volume is insufficient and grafting is declined
- Uncontrolled diabetes
- Immunosuppressive conditions
- Smoking more than 10–15 cigarettes a day
- History of bisphosphonate or anti-resorptive therapy (risk of osteonecrosis)
The goal is to choose a treatment that does more than change how teeth look. Ideally it should support long term oral health, feel comfortable in function and fit well with your general health and lifestyle.
Veneers vs dental implants at a glance
Aspect | Veneers | Dental implants |
Main purpose | Improve the appearance of existing teeth | Replace missing or non restorable teeth |
Tooth status | Tooth is present and structurally sound | Tooth is missing or must be removed |
What is treated | Front surface of the tooth | Whole tooth, including the root |
Typical preparation | Around 0.5 to 0.7 mm of enamel removed from the front surface | No tooth left to prepare, implant placed in bone |
Surgery involved | No surgery, tooth preparation only | Minor surgical procedure to place fixture in jaw bone |
Healing time | Usually days to a few weeks for any sensitivity to settle | Implant integration often 8 to 16 weeks or more before final crown |
Typical lifespan | Often quoted around 7 to 15 years, depending on forces and habits | Often quoted around 90 to 95 per cent survival at 10 years with good care |
Number of teeth treated | Commonly 1 tooth or a set of 2, 4, 6 or more for a smile line | Often 1 implant per missing tooth, or a few implants to support bridges or dentures |
Effect on neighbouring teeth | Does not usually change neighbouring teeth directly | Can help preserve bone in the area of the missing tooth |
Aesthetic use | Colour change, closing small gaps, fixing chips or minor misalignment | Filling a visible gap so the smile line looks complete |
Invasiveness for the tooth | Irreversible removal of a thin layer of enamel | Tooth usually already missing or extracted |
Suitability for heavy grinders | May chip or debond more easily if grinding is not managed | Requires careful design and often a night guard in strong grinders |
Maintenance | Good oral hygiene, avoiding biting hard objects, possible replacement over time | Regular professional reviews, excellent gum care around the implant |
Main limitations | Tooth must be present and reasonably healthy | Needs enough healthy bone and good gum and general health |
Veneers and dental implants serve very different purposes, and the right choice depends on the condition of the tooth, the health of the gums and bone, the bite and the patient’s long term expectations. Veneers work best when the natural tooth is still present and structurally sound, and when the goal is to improve colour, shape or minor alignment. Implants are more suitable when a tooth is missing or cannot be restored predictably, offering a long term replacement with high survival rates.
Neither option is automatically better. Each comes with its own lifespan, maintenance needs and costs over time, and each can produce excellent results when used in the right situation. A careful examination allows a dentist to assess the specific tooth, the overall mouth and the patient’s preferences before recommending treatment.
A balanced decision takes into account health, function, appearance and the likely long term investment. With the right planning, both veneers and implants can contribute to a comfortable, natural looking and stable outcome over many years.
Frequently asked questions
In general, dental implants have higher long term survival rates than veneers.
- Many studies show single implants with around 90–95% survival at 10 years when well planned and maintained.
- Veneers often last around 7–15 years, depending on material, bite forces, oral hygiene and habits like clenching or grinding.
Veneers sit on the surface of a tooth, so they are more exposed to chipping, wear and changes in the underlying tooth over time. Implants are within the bone, so their risks are usually related to gum health, bone levels and bite loading.
Upfront, a single dental implant with crown is usually more expensive than a single veneer. However, the comparison is not always one to one. For example:
- Veneers are often done in sets of 2, 4, 6 or 8 teeth for a consistent appearance.
- An implant usually replaces one missing tooth, although it can support bridges or dentures.
Costs vary with:
- Number of teeth involved
- Materials and laboratory work
- Need for additional procedures, such as bone grafting or gum contouring
- Location and practice fees
Because of these variables, it is more accurate for a dentist to present a written treatment plan with itemised costs rather than general figures.
Pain experience is individual, but the pattern is usually:
- Veneers:
- No surgery, so most patients report mild discomfort rather than pain.
- Some temporary sensitivity to hot and cold can occur after enamel preparation.
- Implants:
- Involve a minor surgical procedure to place the fixture in bone.
- Most patients manage well with local anaesthetic and simple pain relief afterwards.
- Discomfort is usually greatest in the first 24–72 hours and then settles.
Good planning, clear instructions and appropriate pain control typically keep both treatments manageable for most people.
Both can look very natural when planned carefully. The result depends more on:
- Shade matching and layering of the ceramic or composite
- Shape design in relation to lips and face
- Gum health and the line of the gums around the teeth
Veneers often blend extremely well in cases where several front teeth are treated together. Implants demand careful work around the gum and bone, especially in the front of the mouth, to avoid visible shadows or mismatched gum levels.
Whitening treatments lighten natural enamel, not porcelain or composite. This means:
- Veneers and implant crowns do not respond to bleaching.
- If whitening is planned, it is usually done before veneers or implant crowns are made.
If existing veneers or crowns no longer match because natural teeth have darkened or been whitened, they may need replacement to match the new shade.
Smoking affects both options, but in different ways.
- Veneers: Smoking can stain the surrounding natural teeth and edges of the veneers. Gum health may be reduced, which can affect the long term appearance.
- Implants: Smoking is a known risk factor for implant complications, including peri implantitis and implant loss. Some studies show higher failure rates in smokers compared to non smokers.
Most dentists will strongly encourage quitting or at least reducing smoking before and after implant surgery, and will also emphasise gum health for veneer patients.
If a tooth needs to be removed, there are three broad timing options for implants:
- Immediate placement at the same visit as extraction, in carefully selected cases
- Early placement after some soft tissue healing
- Delayed placement after full bone healing, often several months later
The best timing depends on infection, bone quality, gum shape and bite forces. In some cases, a temporary denture or bridge is used while the implant heals before the final crown is fitted.
Veneers vs Crowns: Understanding the Difference Through Your Dentist’s Eyes

Choosing between veneers and crowns is one of the most common decisions people face when considering dental treatment. Both options can improve the appearance of your smile, but they serve different purposes and are recommended in different situations. Understanding these differences is important, especially when your oral health, long term function and overall safety are involved.
The team at Gisborne explains what veneers and crowns are, how each treatment works and when they are typically used; with key differences being in cost, durability and impact on your natural teeth. The goal is to give you clear, trustworthy guidance so you can feel more confident in your decision making, whether you are focused on cosmetic improvements or addressing structural concerns.
Every mouth is unique, and no online resource can replace a personalised assessment. If you are considering veneers, crowns or any other treatment, a qualified dental professional can help you understand the best option for your oral health and long term goals.
What are veneers?
Veneers are thin, custom made shells that are bonded to the front surface of your teeth. They are designed to aestheticize the appearance of your smile by improving the shape, colour and overall uniformity of each member. Veneers sit only on the visible front portion of the tooth, which means most of your natural tooth structure stays intact.
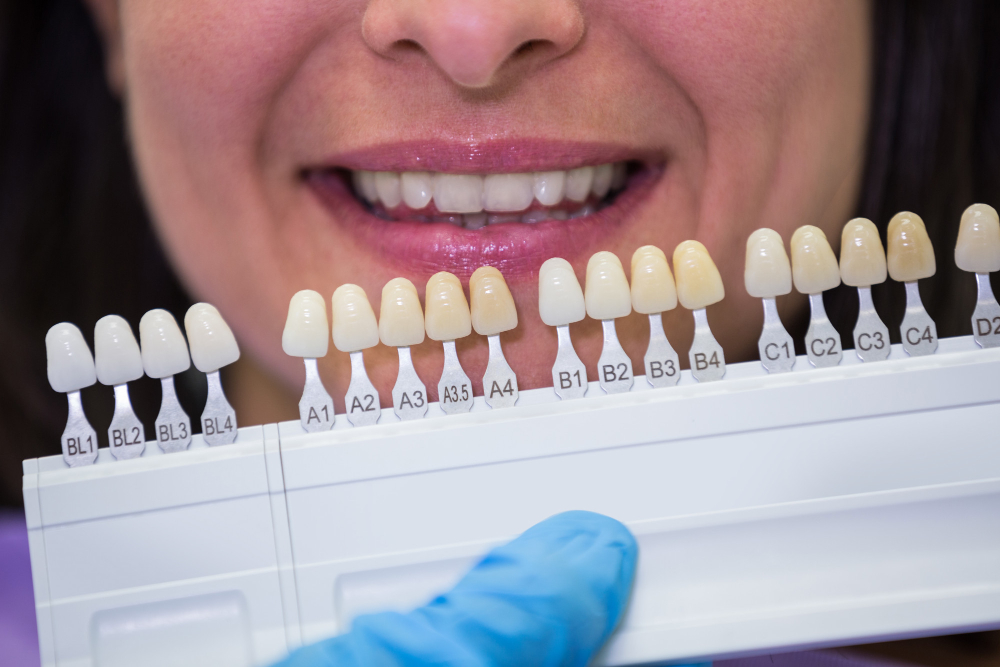
Materials Used in Veneers
Veneers are typically made from either:
- Porcelain, which offers a natural, translucent look and high stain resistance. Porcelain veneers are known for their durability and lifelike finish.
- Composite resin, which is more affordable and can often be applied in a single appointment. Composite veneers can achieve great cosmetic results, although they are generally less durable than porcelain.
Both materials are colour matched to blend inconspicuously with your natural teeth.
Aesthetic Benefits
Veneers are popular for their ability to transform the appearance of a smile with minimal invasiveness. They can:
- Brighten heavily discoloured teeth
- Improve symmetry and shape
- Close small gaps
- Correct mild misalignment
- Repair small chips or fractures
Because veneers cover only the front surface, they keep the natural tooth largely preserved while creating a noticeable and elegant cosmetic improvement.
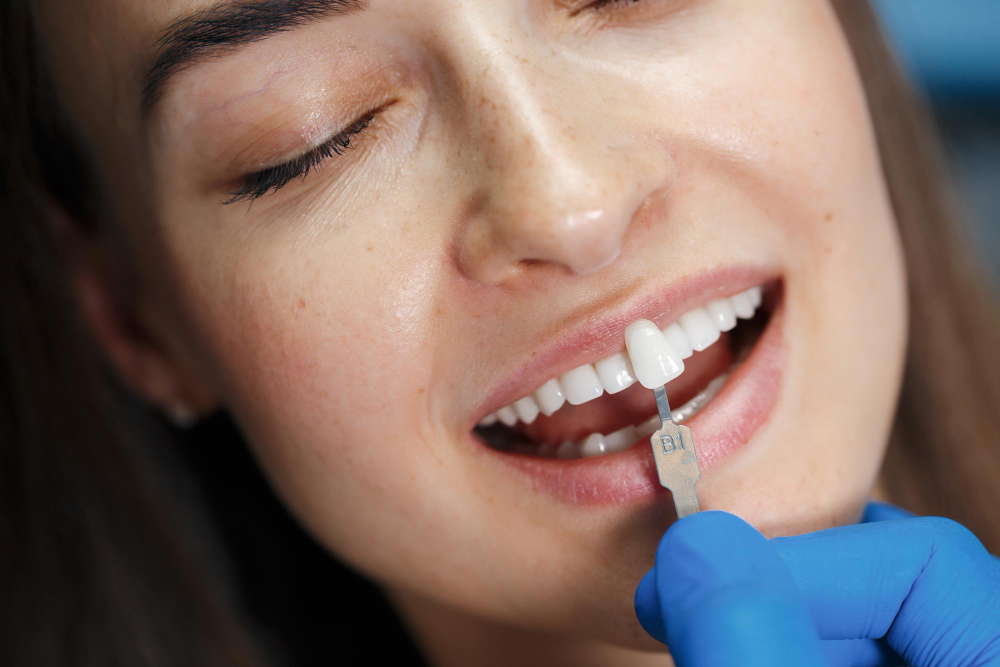
When Veneers Are Recommended
Dentists often recommend veneers for patients who:
- Want a cosmetic enhancement rather than a functional repair
- Have healthy teeth and gums with minor aesthetic concerns
- Have superficial chips, cracks or discolouration
- Are seeking a smile makeover or uniformity across multiple teeth
Veneers work best, in other words, when the underlying tooth structure is strong, as they are intended to improve appearance rather than restore severely damaged or weakened teeth.
What Are Crowns?
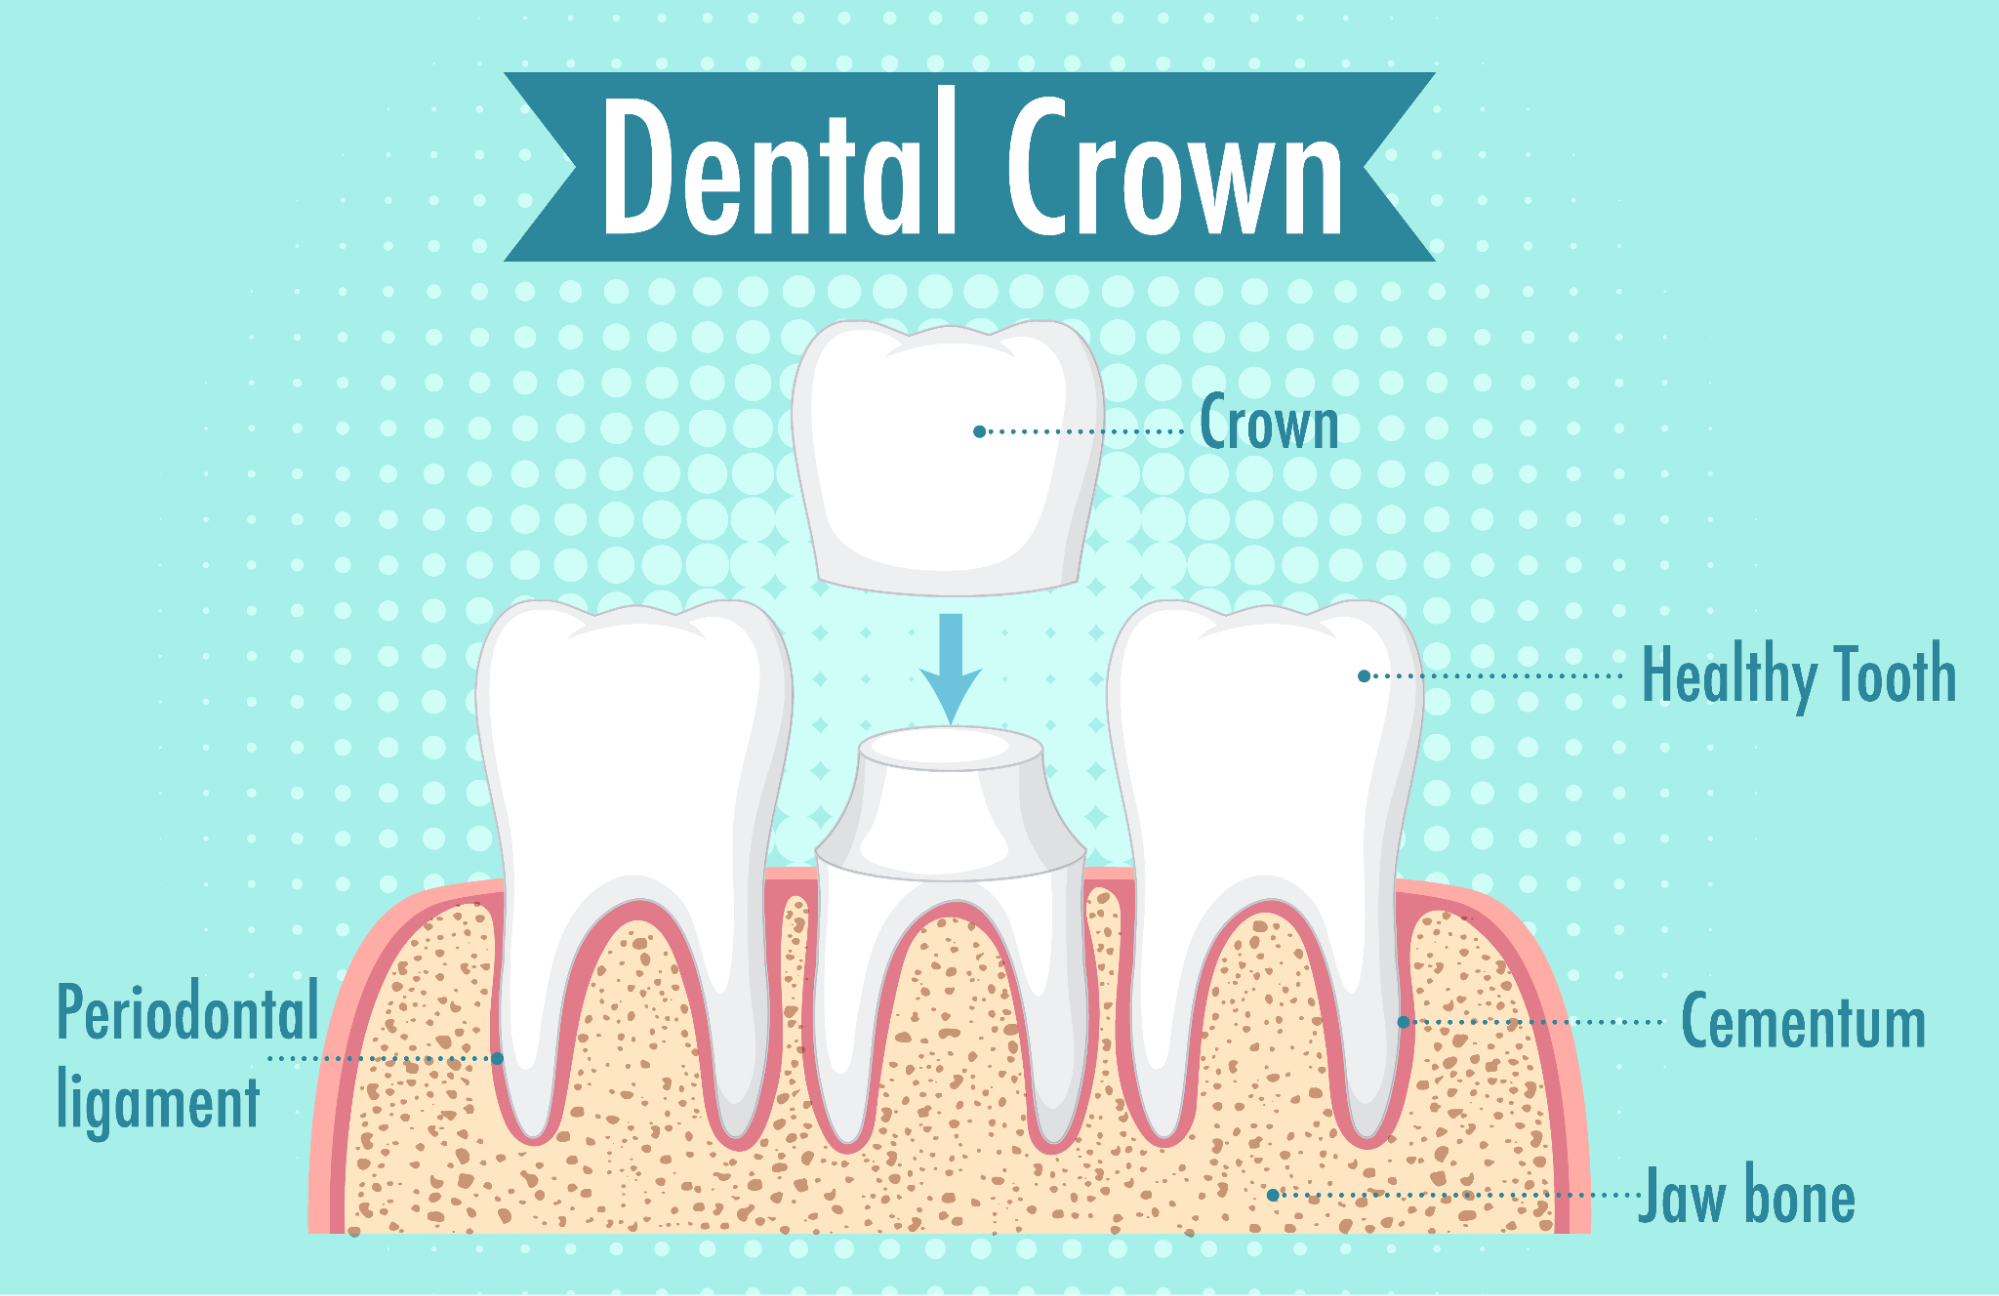
Crowns are full coverage dental caps that completely encase a tooth to protect it, strengthen it and restore its natural shape and function. Unlike veneers, which cover only the front surface, a crown sits over the entire tooth to completely protect the existing enamel and bone from further damage. Crowns are commonly used when a tooth is too damaged or weakened for a veneer or filling.
Materials Used in Crowns
Crowns can be made from a range of materials, each chosen for its strength, appearance or suitability for different parts of the mouth.
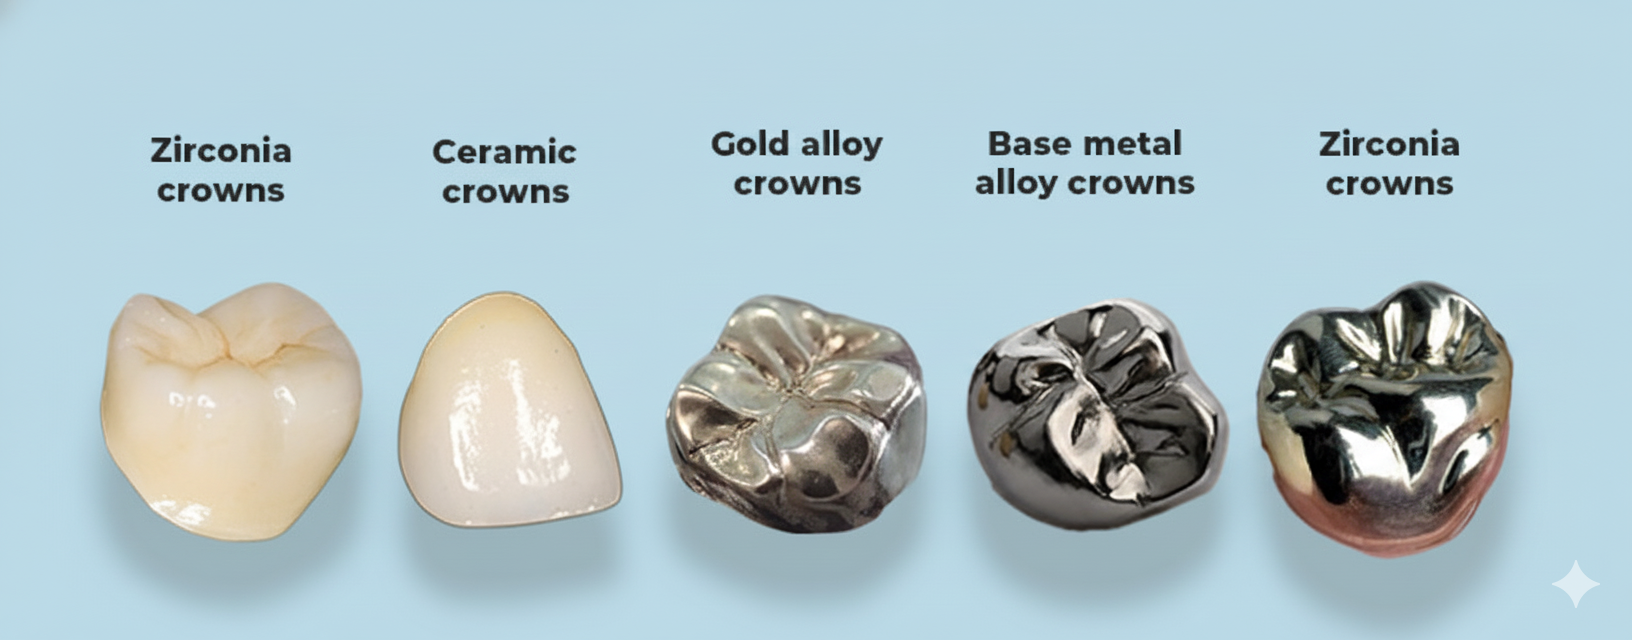
Types of Dental Crown Materials:
- Porcelain or Ceramic: These materials mimic natural tooth appearance, making them ideal for visible front teeth, where many feel that aesthetics amd uniformity are a priority.
- Zirconia: Known for its exceptional strength, Zirconia is well-suited for molars or patients who exert significant biting forces.
- Porcelain Fused to Metal (PFM): This option provides a combination of strength from the metal base and an appealing aesthetic outer layer of porcelain.
- Gold Alloy: Highly durable and gentle on opposing teeth, Gold Alloy is often the material of choice for back molars.
Each material has benefits depending on the location of the tooth and the patient’s functional needs.
Functional Benefits
Crowns are a reliable way to restore a tooth’s structure and long term function.
They can:
- Reinforce teeth that are cracked, fractured or worn down
- Restore strength after a root canal
- Protect teeth with large or failing fillings
- Improve bite and chewing ability
- Provide both cosmetic and functional improvement when needed
Crowns are especially important when a tooth can no longer support everyday chewing forces on its own.
When Crowns Are Typically Used
Dentists often recommend crowns for:
- Teeth with significant decay or structural damage
- Teeth that have undergone root canal treatment
- Cracked or broken teeth that cannot be repaired with a filling
- Restoring badly worn down teeth
- Supporting dental bridges or covering dental implants
Crowns offer a durable, long lasting solution when a tooth requires more protection and strength than a veneer can provide.
Veneers vs Crowns - Key Differences and How to Choose
Veneers and crowns can both improve the appearance of your teeth, but they are designed for different purposes. Understanding how each treatment works, how much tooth structure is involved and what problems they address will help you make a confident and informed decision.
Application Process
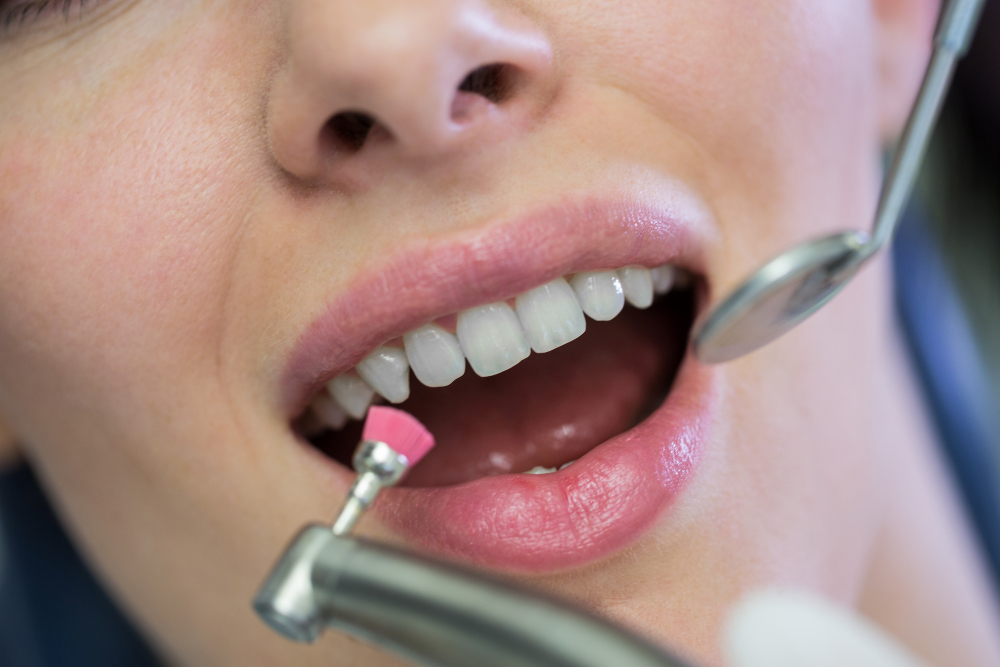
Veneers
Veneers are thin shells bonded to the front surface of the tooth. The preparation is minimal and usually involves removing a small amount of enamel so the veneer sits naturally. They are ideal for cosmetic enhancement without altering the whole tooth.
Crowns
Crowns encase the entire tooth and require more reshaping. Once an image or impression of the ideal tooth shape to ergonomically fit into your mouth has been designed, , your dentist will then bond the crown to your damaged tooth with a dental adhesive. Hardening of the adhesive typically finalises over 2 weeks, following this, allowing for bonding to complete, and eating habits to be restored from initial sensitivity or pain. This makes crowns suitable for repairing structural or functional problems rather than cosmetic concerns alone.
Durability and Longevity
Veneers
Porcelain veneers generally last 7 to 10 years, and sometimes longer. They are strong but thinner than crowns, so they work best for surface level cosmetic concerns rather than heavy chewing forces.
Crowns
Crowns typically last 10 to 15 years or more, depending on the material and oral habits. Because they surround the entire tooth, crowns provide greater structural support and long term durability.
Impact on Natural Tooth Structure
- Veneers preserve more of the natural tooth, making them a conservative option when the tooth is healthy.
- Crowns require more reduction but offer stronger reinforcement for compromised teeth.
Cost Differences
The cost of veneers and crowns varies depending on the material, tooth location, and the level of customisation required. As a general guide:
- Composite veneers: From $350 to $650 per tooth
These are more affordable and usually completed in a single visit. They’re ideal for minor cosmetic improvements but may not last as long as porcelain. - Porcelain veneers: From $1,200 to $2,000 per tooth
These are custom-made in a dental lab and offer a natural look with greater durability, making them a popular choice for long-term cosmetic improvements. - Crowns: From $1,600 to $2,500 per tooth
Crowns involve more preparation and full coverage of the tooth, often using materials like porcelain-fused-to-metal, zirconia, or full ceramic for strength and function.
In some cases, crowns may be eligible for private health insurance rebates, especially if placed for restorative or functional reasons (such as a cracked, broken or root canal-treated tooth). Veneers, on the other hand, are generally considered cosmetic and unlikely to be covered.
To get an accurate quote, it’s best to have a personalised consultation. The dentist will assess your needs and discuss the most suitable options for your smile and budget.
Aesthetic vs Functional Benefits
When Veneers Are Best
Choose veneers if your goals are cosmetic and your teeth are otherwise healthy. Veneers are ideal for:
- Whitening and colour correction
- Improving shape and symmetry
- Closing small gaps
- Minor chips or enamel imperfections
When Crowns Are Best
Choose crowns if your tooth needs protection, strength or full structural restoration. Crowns are recommended for:
- Cracks or fractures
- Large fillings that no longer support the tooth
- Teeth that have undergone a root canal
- Severely worn down or damaged teeth
- Teeth that must withstand strong bite forces
How to Decide Which Option Suits You
Think about your main priority:
- Cosmetic improvement only → Veneers
- Structural repair or long term protection → Crown
- Both cosmetic and functional needs → Often a crown
Your oral health also plays a major role:
- Healthy teeth with minor aesthetic concerns respond well to veneers.
- Weakened, decayed or heavily restored teeth typically require a crown to prevent future damage.
A dentist may also suggest a combination of veneers and crowns in larger smile transformations, depending on the condition of each individual tooth.
At a Glance: Quick Comparison Table
Feature | Veneers | Crowns |
Coverage | Front surface only | Entire tooth |
Main Purpose | Cosmetic enhancement | Strength, protection and cosmetic |
Tooth Reduction | Minimal | Moderate to extensive |
Durability | 7 to 15 years | 10 to 20 years |
Best For | Discolouration, shape, minor chips | Damage, fractures, root canal teeth |
Cost | Lower | Higher |
Insurance | Typically no | Sometimes yes |
Crowns vs Caps: Are They the Same?
The terms crowns and caps are often used interchangeably, which can create some confusion for patients. In modern dentistry, both words refer to the same treatment.
Why the Two Terms Exist
Traditionally, “cap” was the informal, everyday term used to describe a restoration that covers the entire tooth. Over time, dental professionals moved toward the term “crown” because it more accurately describes the function and design of the restoration.
What They Both Mean
Crown, sometimes referred to as a cap, is a restoration designed to fully cover a damaged or weakened tooth, providing complete coverage and protection. Its function is to restore the tooth’s original shape, size, and appearance for strength and function, while also improving its cosmetic appeal as a visually undisturbed tooth. Crowns can be fabricated from various materials, including porcelain, ceramic, zirconia, or metal alloys.
There is no difference in how the treatment is performed or how the final result functions.
Veneers vs Crowns: Real Examples
As your dentist, one of my responsibilities is helping you understand why certain treatments are recommended over others; veneers and crowns can both improve your smile, but the reasons for choosing one instead of the other are very different. Here are a few real world examples I often see in the clinic:
Scenario 1: When You Want a Cosmetic Upgrade
Your goal: A brighter, more even smile.
What I see: Healthy tooth structure with mild discolouration or minor shape concerns.
My recommendation: Veneers
In this situation, your teeth are strong and only need cosmetic improvement. Veneers help to refine the colour, shape and symmetry without heavily altering the natural tooth. They are a conservative and effective option for enhancing your smile.
Scenario 2: When a Tooth Cracks Suddenly
Your goal: Relief, comfort and protection.
What I see: A crack running through the tooth, often after biting something hard.
My recommendation: Crown
A cracked tooth needs strength and protection. A veneer only covers the front surface, so it cannot reinforce a weakened tooth. A crown encases the entire tooth, preventing the crack from spreading and restoring your ability to chew safely.
Scenario 3: After a Root Canal
Your goal: Long term stability.
What I see: A tooth that has been weakened because the nerve has been removed.
My recommendation: Crown
Root canal teeth become more brittle over time. A crown acts like a helmet, protecting the tooth from fractures. This is essential for keeping the tooth healthy and functional in the long term.
If you are considering veneers, crowns or any other cosmetic or restorative treatment, the next step is a personalised assessment with a qualified dental professional. Every smile is unique, and a consultation allows your dentist to examine your teeth, understand your goals and recommend the safest and most suitable option for your long term oral health.
A short appointment can give you clear guidance, accurate pricing and peace of mind about the treatment that will work best for you.
Ready to explore your options?
Book a consultation online or contact our team to schedule your appointment. We are here to help you make a confident and informed decision about your smile.
FAQs
Veneers generally cost less than crowns, especially if they are made from composite resin. Porcelain veneers sit in the mid range, while crowns are usually more expensive due to the extra materials and processes involved in order to produce a full coverage design over the concerned tooth. Prices vary between clinics and depend on the material used, the tooth being treated and the complexity of the case. Your dentist can provide an accurate quote after assessing your teeth.
Porcelain veneers usually last between 7 and 15 years with good oral hygiene and regular check ups. Crowns often last 10 to 20 years or longer because they offer full coverage and are designed to withstand heavier biting forces. Longevity depends on the material chosen, your oral habits and how well the underlying tooth is protected.
Yes. Both veneers and crowns can be replaced if they chip, crack or wear down over time. Your dentist will assess the cause of the damage, check the health of the underlying tooth and recommend the safest replacement option. Early intervention helps prevent further issues.
All dental treatments carry some level of risk, although complications are uncommon when performed by a qualified dentist. Possible risks include:
- Tooth sensitivity
- Damage to surrounding teeth
- Chipping or cracking over time
- Gum irritation
- Need for replacement in the future
Your dentist will discuss any potential concerns during your consultation and ensure the treatment is appropriate for your oral health.
Porcelain veneers and ceramic crowns are highly resistant to staining. Composite veneers can stain more easily and may need occasional polishing. Regardless of the material, maintaining good oral hygiene and limiting strong staining foods can help keep your restoration looking its best.
Most patients experience little to no discomfort during the preparation of veneers or crowns. Dentists use a local anaesthetic to ensure the procedure is comfortable. Mild sensitivity may occur afterwards, but this usually settles within a few days.
Most private health insurance policies classify veneers as cosmetic, so they are not usually covered. Crowns may be partially covered when required for functional or restorative reasons. It is best to check your policy or speak with your insurer for clarification.
Composite vs Porcelain Veneers: The Ultimate Guide on Materials, Procedure, Cost, and More
A captivating, confident smile can transform not only your appearance, but also your sense of self as the individual you imagine yourself to be, more profoundly. Dental veneers represent one of the most effective cosmetic treatments for achieving a smile that you’re happy with, masking imperfections such as discoloration, chips, gaps, and minor misalignments. Two primary options are foremost in the cosmetic dentistry landscape as go-to solutions: porcelain and composite veneers. Each material offers unique advantages, considerations, and investment requirements that directly impact treatment outcomes and long-term satisfaction. This comprehensive guide explores both veneer types in depth examining their material properties, clinical procedures, maintenance needs, cost implications, and ideal candidacy so you can make an informed decision tailored to your smile goals.
Understanding Veneers: Purpose and Applications
Dental veneers are ultra-thin shells bonded to the front surfaces of teeth to smooth over their aesthetic appeal and mask cosmetic flaws. Unlike crowns, which cover the entire tooth, veneers require minimal alteration of natural tooth structure, preserving most of the enamel. Common indications include:
- Discoloration resistant to whitening
- Chipped, cracked, or worn enamel
- Small gaps or minor misalignment
- Uneven tooth size, shape, or surface irregularities
By selecting the appropriate veneer type and following meticulous treatment protocols, dentists can achieve dramatic smile makeovers with natural-looking results that blend holistically with surrounding dentition.
What Are Porcelain Veneers?
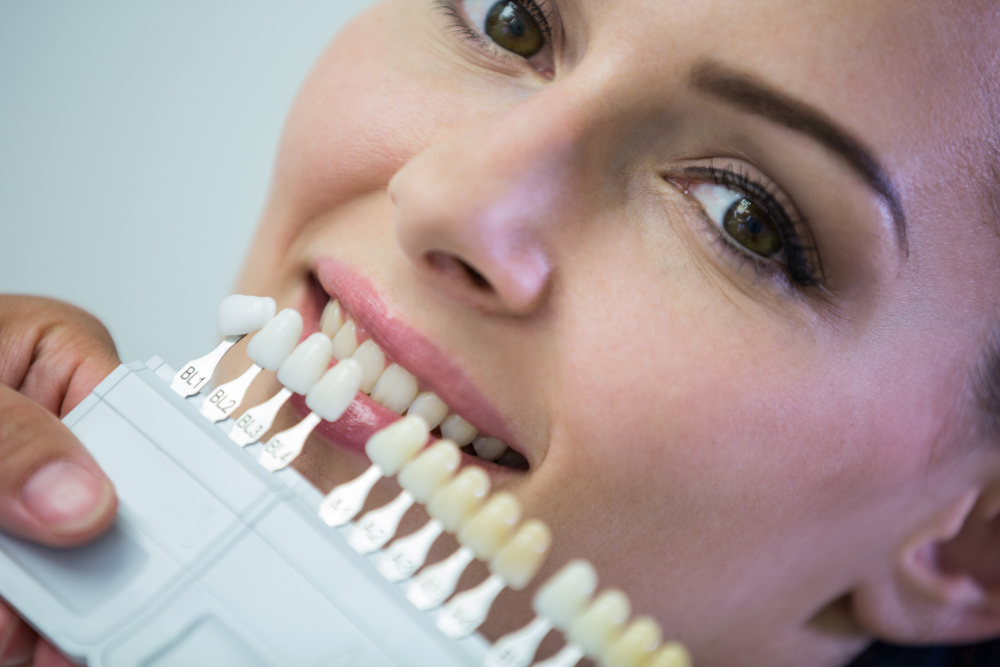
Porcelain veneers are a cosmetic dental solution in a lightweight, durable porcelain material. These ultra-thin, custom-crafted shells are made from high-quality porcelain, a material loved for its natural appearance and impressive strength. Thanks to its translucent quality, porcelain reflects light just like real teeth, allowing the veneers to blend in organically with the rest of your smile.
The treatment begins with a careful and precise preparation process. Your dentist gently removes a very thin layer of enamel from the front of the teeth. This small adjustment ensures the veneers sit perfectly in place, and look naturally aligned rather than thick or overtly layered. After this step, detailed impressions are taken to guide the creation of your personalised veneers in a professional dental laboratory.
Experienced technicians then craft each veneer with precision, tailoring the shape, shade and size to complement your natural teeth often with the use of design simulation software like CAD in rendering an initial model. During the final appointment, your dentist securely bonds the veneers to your teeth using a strong dental adhesive. The outcome is a radiant, confident smile that not only looks incredible but also adds a layer of strength and protection to the teeth. Porcelain veneers are a long-lasting, reliable choice for anyone ready to achieve the smile they’ve always wanted.
What Are Composite Veneers?
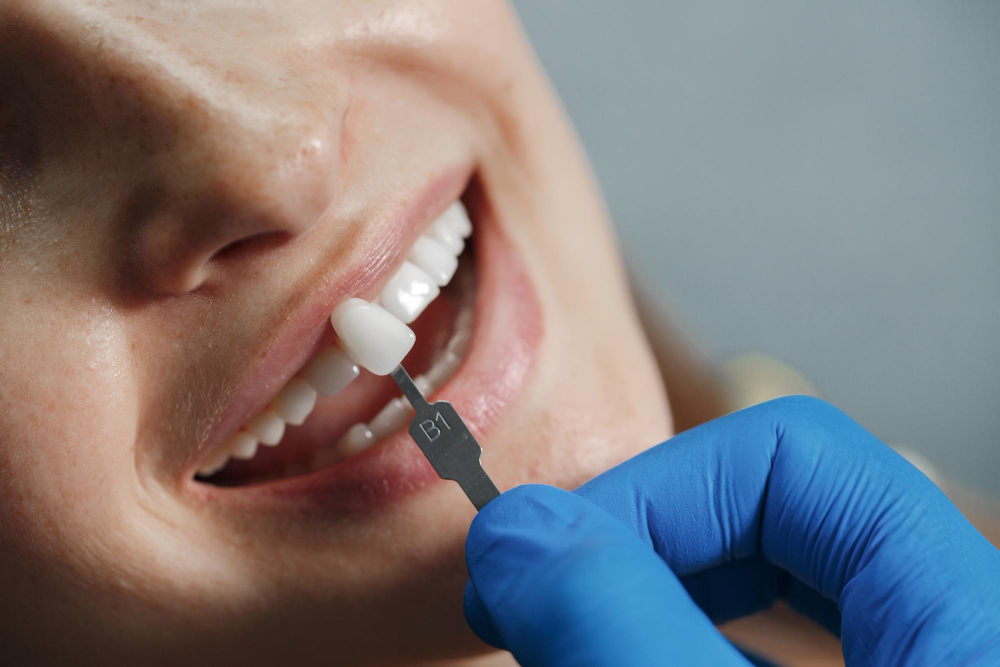
Composite veneers are an affordable and flexible cosmetic dentistry alternative designed to enhance the appearance of your smile. Made from tooth-coloured composite resin, these veneers are carefully colour-matched to blend naturally with your existing teeth. Their adaptable material allows for great customisation, making them a suitable solution for correcting a range of imperfections such as chips, gaps, discolouration or uneven tooth shapes.
One of the biggest advantages of composite veneers is the convenience of the procedure, with treatment being typically completed in just one dental visit. During the appointment, your dentist expertly applies and sculpts layers of composite resin directly onto the surface of the teeth. This hands-on approach allows for precise shaping and smoothing, ensuring the final result looks natural and harmonious with the rest of your smile.
Composite veneers are an excellent choice for patients wanting visible results without removing a significant amount of enamel. Since the veneers are created directly on the teeth rather than in a lab, the process is faster and more cost-effective. This makes composite veneers a popular option for those looking to achieve a brighter, more refined smile with minimal downtime and at a more budget-friendly price.
Material Composition and Properties
Porcelain Veneers
Porcelain veneers are constructed from high-grade dental ceramics, primarily feldspathic porcelain or lithium disilicate. These materials feature a crystalline microstructure composed of silicon dioxide (60–64%) and aluminum oxide (20–23%) that closely replicates natural enamel’s optical properties. The glass-like ceramic undergoes high-temperature firing to create a rigid, non-porous surface with exceptional translucency and light-reflecting qualities.
- Made from feldspathic porcelain or lithium disilicate ceramic with glass-like composition
- Crystalline structure provides exceptional translucency that mimics natural tooth enamel
- Non-porous surface is highly resistant to staining from coffee, tea, wine, and tobacco
- Compressive strength of 350–400 MPa rivals natural enamel for durability
- Brittle material cannot be repaired once damaged; fractures require complete replacement
Composite Veneers
Composite veneers are formulated from a resin-based material consisting of three main components: an organic polymer matrix (typically Bis-GMA or UDMA), inorganic filler particles (quartz, silica, or ceramic microspheres), and coupling agents that bond the resin to fillers. Modern nano-hybrid composites incorporate nanometer-scale fillers for improved polish and aesthetics, though the resin’s molecular structure limits translucency compared to ceramic.
- Composed of Bis-GMA or UDMA resin matrix with inorganic filler particles
- Moderate translucency provides good aesthetics but lacks ceramic’s depth and light reflection
- Porous polymer matrix allows microscopic water and pigment penetration over time
- Lower compressive strength of 100–200 MPa makes composite more susceptible to wear
- Flexible resin can be chemically bonded to fresh material, enabling chairside repairs
Comparing the Procedure: Porcelain vs Composite Veneers
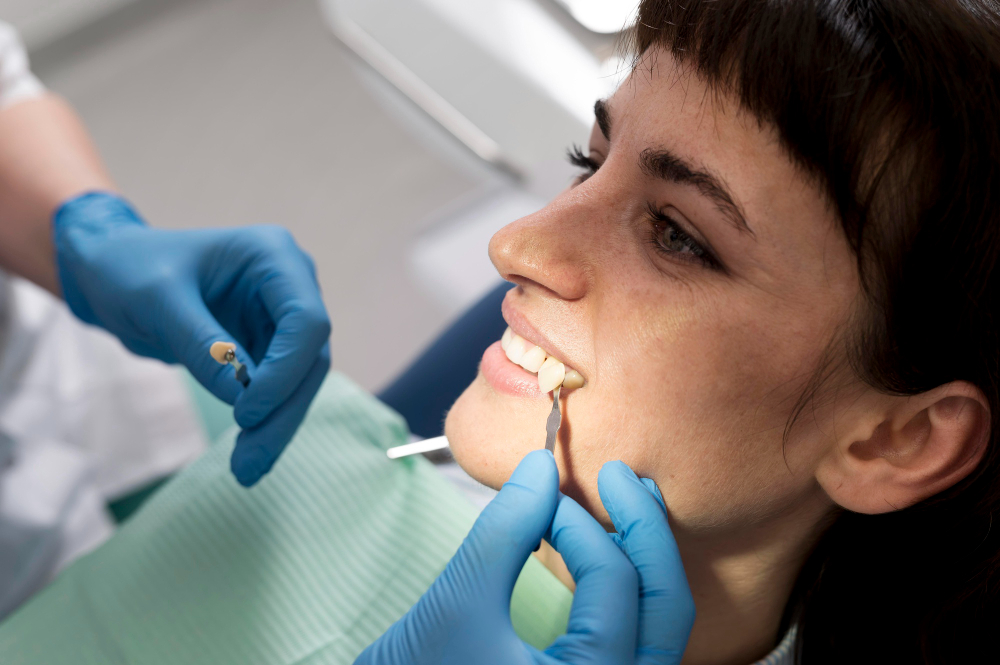
Porcelain Veneer Procedure
The porcelain veneer process requires multiple appointments spanning one to two weeks. During your initial consultation, the dentist assesses your oral health and discusses aesthetic goals. At the preparation appointment, approximately 0.3–0.5 mm of enamel is removed to accommodate the veneer thickness without adding bulk. Detailed impressions or digital scans are sent to a laboratory where custom veneers are crafted over one to two weeks.
- Requires 2–3 dental visits over 1–2 weeks to complete the full process
- Enamel removal of 0.3–0.5 mm is irreversible and permanent
- Laboratory fabrication ensures precise custom fit and optimal shade matching
- Temporary veneers protect prepared teeth while permanent ones are being made
- Final bonding uses light-curing resin cement for secure, lasting attachment
Composite Veneer Procedure
The composite veneer application is completed in a single visit, typically lasting one to two hours. After shade selection, minimal tooth preparation is performed often just light etching. The dentist directly applies tooth-colored composite resin in layers, sculpting and shaping it chairside. Each layer is hardened with a curing light before adding the next, allowing real-time adjustments based on your feedback.
- Single-visit completion from start to finish (1–2 hours total)
- Minimal to no enamel removal required, preserving natural tooth structure
- Direct chairside sculpting allows immediate adjustments and instant results
- No laboratory involvement or waiting period between appointments
- Treatment is largely reversible if desired changes are needed in the future
Cost Analysis: Porcelain Veneers vs Composite Veneers

Porcelain Veneer Costs
Porcelain veneers represent a premium investment in cosmetic dentistry. In Australia, costs typically range from $1,200 to $3,000 per tooth, with major metropolitan areas commanding higher fees. The elevated pricing reflects premium ceramic materials, custom laboratory fabrication by skilled technicians, and the extensive expertise required from cosmetic dentists. While the initial outlay is substantial, the 15–20 year lifespan translates to strong long-term value.
- Cost per tooth: $1,200–$3,000 in Australia
- Six-tooth smile makeover: $7,200–$18,000
- Average lifespan of 15–20 years provides long-term value
- Annual cost per tooth: approximately $60–$200 over lifetime
- Higher upfront investment due to laboratory fees and premium materials
Composite Veneer Costs
Composite veneers offer a more accessible price point for patients seeking smile enhancement on a budget. Australian pricing ranges from $250 to $1,500 per tooth, with most practices charging $400–$800. The lower cost stems from direct chairside application that eliminates laboratory fees and the use of more affordable resin materials. However, the 5–7 year lifespan means multiple replacement cycles may be needed.
- Cost per tooth: $250–$1,500 (typically $400–$800)
- Six-tooth treatment: $1,500–$9,000
- Average lifespan of 5–7 years requires periodic replacement
- Annual cost per tooth: approximately $80–$300 when factoring in replacements
- Lower initial investment but potentially higher lifetime costs due to replacement cycles
Cost Comparison Table
| Cost Factor | Porcelain Veneers | Composite Veneers |
| Single Tooth | $1,200 – $3,000 | $250 – $1,500 |
| Average Lifespan | 15 – 20 years | 5 – 7 years |
| Annual Cost per Tooth | $60 – $200 | $80 – $300 |
| Laboratory Fees | Included in cost | Not applicable |
| Number of Visits | 2–3 appointments | Single appointment |
| Replacement Frequency | Once every 15–20 years | Every 5–7 years |
Long-term Value | Higher (fewer replacements) | Lower (multiple replacements) |
Durability: Porcelain vs Composite Veneers
Porcelain Veneer Durability
Porcelain veneers are renowned for their exceptional longevity and resilience. With proper care, these ceramic shells can last from any where within 10 to 20 years, with clinical studies showing survival rates of 95% at 10 years and 85% at 15 years. The high-quality ceramic material withstands daily wear remarkably well, maintaining both structural integrity and aesthetic appeal over extended periods.
- Lifespan of 10–20 years with proper maintenance and regular dental check-ups
- High compressive strength (350–400 MPa) rivals natural enamel for wear resistance
- Non-porous surface prevents staining and maintains color stability throughout lifetime
- Cannot be repaired if damaged; chips or fractures require complete veneer replacement
- Patients with bruxism need protective nightguards to prevent stress-related fractures
Composite Veneer Durability
Composite veneers offer more modest durability with an average lifespan of 5 to 7 years. The resin-based material is softer and more porous than porcelain, making these veneers more vulnerable to everyday stresses. However, their repairability provides a significant advantage when minor damage occurs.
- Average lifespan of 5–7 years before replacement becomes necessary
- Lower compressive strength (100–200 MPa) makes them more susceptible to wear and chipping
- Porous resin gradually absorbs food and beverage pigments, causing discoloration over time
- Professional polishing every six months helps maintain appearance and manage surface staining
- Minor chips and cracks can be easily repaired chairside without full veneer replacement
Maintenance of Porcelain and Composite Veneers
Porcelain Veneer Maintenance
Porcelain veneers require minimal ongoing maintenance due to their durable, non-porous surface. Standard oral hygiene practices are sufficient to keep them looking pristine for decades. The ceramic material’s stain-resistant properties mean patients can enjoy their favorite foods and beverages without excessive worry. However, avoiding extremely hard foods and wearing protective appliances for teeth grinding helps maximise longevity.
- Brush twice daily with non-abrasive toothpaste and soft-bristled toothbrush
- Floss daily or use interdental brushes to maintain healthy gums and veneer margins
- Professional dental cleanings every six months to remove plaque and assess veneer condition
- Avoid biting hard objects like ice, pens, or fingernails to prevent fractures
- Wear nightguards if you have bruxism or teeth-grinding habits to protect against stress fractures
Composite Veneer Maintenance
Composite veneers demand more diligent care to preserve their appearance and extend their lifespan. The porous resin material is susceptible to staining and surface wear, requiring regular professional attention. Patients must be more vigilant about dietary choices and maintain consistent oral hygiene routines. However, minor damage can be quickly repaired during routine visits, making maintenance more flexible.
- Brush gently twice daily to avoid micro-abrasions on the softer resin surface
- Floss daily to prevent gum disease and maintain veneer margins
- Professional polishing every six months is essential to restore shine and remove surface stains
- Limit consumption of staining substances like coffee, tea, red wine, and tobacco
- Minor chips or discoloration can be repaired chairside without full veneer replacement
Pros and Cons of Porcelain and Composite Veneers

Porcelain Veneers
Advantages:
- Exceptional natural appearance with translucency that mimics tooth enamel perfectly
- Superior stain resistance maintains brightness for 15–20 years without discoloration
- Long-lasting durability withstands normal wear and chewing forces effectively
- Minimal maintenance required beyond standard oral hygiene practices
- Addresses comprehensive cosmetic concerns including severe discoloration and significant defects
- Color stability ensures veneers retain their original shade throughout their lifespan
- Biocompatible material is well-tolerated by gum tissue
- Protects and strengthens underlying tooth structure
Disadvantages:
- High initial cost ranging from $1,200–$3,000 per tooth
- Irreversible procedure requiring permanent enamel removal of 0.3–0.5 mm
- Multiple appointments needed over 1–2 weeks for laboratory fabrication
- Cannot be repaired if damaged; chips or fractures require complete replacement
- Temporary tooth sensitivity may occur after enamel preparation
- Brittle material can fracture under extreme force or impact
- Not covered by most dental insurance plans
- Requires lifetime commitment to veneer maintenance
Composite Veneers
Advantages:
- Affordable cost of $250–$1,500 per tooth fits more modest budgets
- Single-visit application provides immediate smile transformation in 1–2 hours
- Minimal to no enamel removal preserves natural tooth structure
- Largely reversible treatment option if circumstances change
- Easy chairside repairs for minor chips or surface damage
- Real-time adjustments allow patient feedback during application
- Good aesthetic results for minor cosmetic corrections
- Less invasive procedure with reduced tooth sensitivity risk
Disadvantages:
- Shorter lifespan of 5–7 years requires frequent replacements
- Porous material gradually absorbs stains from food and beverages
- Lower durability makes composite more prone to chipping and wear
- Professional polishing required every six months to maintain appearance
- Less translucent than porcelain, lacking depth and natural light reflection
- Surface roughening over time diminishes glossy finish
- Not ideal for severe discoloration or major cosmetic corrections
- Higher long-term costs due to multiple replacement cycles
Pros and Cons Summary
Feature | Porcelain Veneers | Composite Veneers |
Aesthetic Quality | Excellent; lifelike translucency | Good; less depth than porcelain |
Stain Resistance | Excellent; non-porous surface | Moderate; porous resin |
Longevity | 15–20 years | 5–7 years |
Tooth Preparation | 0.3–0.5 mm enamel removal | Minimal to none |
Reversibility | Irreversible | Largely reversible |
Procedure Timeline | 2–3 visits over 1–2 weeks | Single visit (1–2 hours) |
Initial Cost | High | Low to moderate |
Maintenance Needs | Low; routine hygiene | Moderate; periodic polishing |
Repairability | Requires replacement | Easily repaired chairside |
Making the Right Choice
Based on my clinical experience and current research, I recommend considering the following factors:
Choose Porcelain Veneers When:
- Budget constraints are primary concern
- Immediate results are needed
- Minimal tooth preparation is desired
- Trial treatment before committing to porcelain
- Single tooth requires attention
Choose Composite Veneers When:
- Budget constraints are primary concern
- Immediate results are needed
- Minimal tooth preparation is desired
- Trial treatment before committing to porcelain
- Single tooth requires attention
A thorough consultation with a skilled cosmetic dentist complete with digital mock-ups, diagnostic wax-ups, and candid discussion of pros, cons, and financial implications ensures an individualised treatment plan that aligns with both smile aspirations and practical concerns.
Final Thoughts
By understanding the nuances of each material, clinical workflow, and cost structure, you can approach your search for a more confident smile knowing that the treatment is reliable. The success of veneer treatment ultimately rests on proper case selection, diligent maintenance, and an understanding of how your lifestyle needs suit the implications of each particular offering. When executed by a qualified clinician committed to aesthetic excellence, veneers unlock an enduring smile that elevates confidence and quality of life for years to come.
How much do braces cost?
Braces play a vital role in orthodontics, helping to correct issues with jaw alignment, crowded teeth, and bite problems. Beyond function, they can also transform a person’s confidence and self-image.
For many patients, though, the first question isn’t about treatment, but about cost. Understanding braces expenses is important for planning, and knowing what influences the final price can help you make an informed decision.
What influences the cost of braces?
The cost of orthodontics varies depending on your specific dental needs. Patients with complex cases, such as severe misalignment or bite correction, usually require longer treatment and more specialised care. These essential treatments typically sit at the higher end of the dental brace cost range. Less complex cases, such as spacing issues or mild crowding, may be quicker and therefore more affordable.
Another factor is if braces are required for functional reasons or chosen purely for cosmetic improvement. Functional cases are usually considered worthy or essential, while optional treatment for minor aesthetic adjustments may be less costly. The experience of your orthodontist and the clinic’s location can also influence the braces cost. Highly qualified specialists with advanced training provide expertise that supports long-term outcomes.
How much do braces cost in Australia?
So, how much are braces in Australia? The cost of braces orthodontist-led treatment typically ranges between $5,000 and $9,000, though this varies by state, clinic, and the type of braces chosen. Traditional metal braces often sit at the lower end of this range, while ceramic or lingual braces may cost more due to their appearance or placement inside the mouth.
Regional variations are also common. Patients in major cities like Melbourne may face slightly higher expenses compared with regional areas, due to demand and overheads. It’s also important to consider additional braces expenses beyond the braces themselves. These may include:
- Initial consultation fees
- Diagnostic imaging and X-rays
- Adjustments and follow-up visits
- Retainers after treatment
Asking for a complete breakdown of the cost of orthodontics upfront ensures there are no surprises later.
Payment options and insurance
Braces represent an investment, but there are flexible options available. Many clinics, including ours, offer structured payment plans that allow you to spread braces expenses over months or years, making treatment more manageable.
Private health insurance may also cover part of the oral braces cost under orthodontic benefits. It’s important to check your policy limits, waiting periods, and annual caps before starting treatment. For younger patients, some government programs or assistance schemes may apply, depending on eligibility and location.
These payment and support options can significantly reduce the cost of braces orthodontist treatment and make care accessible for more families.
FAQs
Most patients wear braces for 18 to 24 months, but the timeframe depends on the complexity of your case. Some may finish treatment earlier, while others with more complex bite issues could require three years or more. Your orthodontist will provide a personalised estimate after a full assessment.
Sometimes clear aligners or removable plates can be an option for mild cases. They can be less noticeable and in some situations more affordable. However, they are not suitable for every patient, particularly if complex corrections are required. Your orthodontist can guide you on the best alternative based on your needs.
Adults can absolutely get braces, and more are choosing treatment later in life to improve function and appearance. Treatment may take longer because adult jaws are fully developed and teeth can move more slowly. Costs are generally similar to teenagers, though in some cases additional appointments may be needed, which can increase expenses slightly.
Payment plans, insurance benefits, and government assistance can help reduce the financial burden. Gisborne Family Dental also allows you to spread payments out over the course of your treatment, making braces more accessible. It’s always worth discussing your financial situation openly with your orthodontist, as flexible solutions are often available to ensure you don’t miss out on essential care.
The cost of braces depends on your individual needs, no two smiles are the same. The best way to understand your options is through a personalised consultation.
for a complete assessment and a clear breakdown of your braces cost. Call us on (03) 8595 1888 or book online.
At Gisborne Family Dental, we are committed to delivering quality, comprehensive dentistry with the utmost integrity, and respect for our patients.